Lashing a camp table and bench from poles
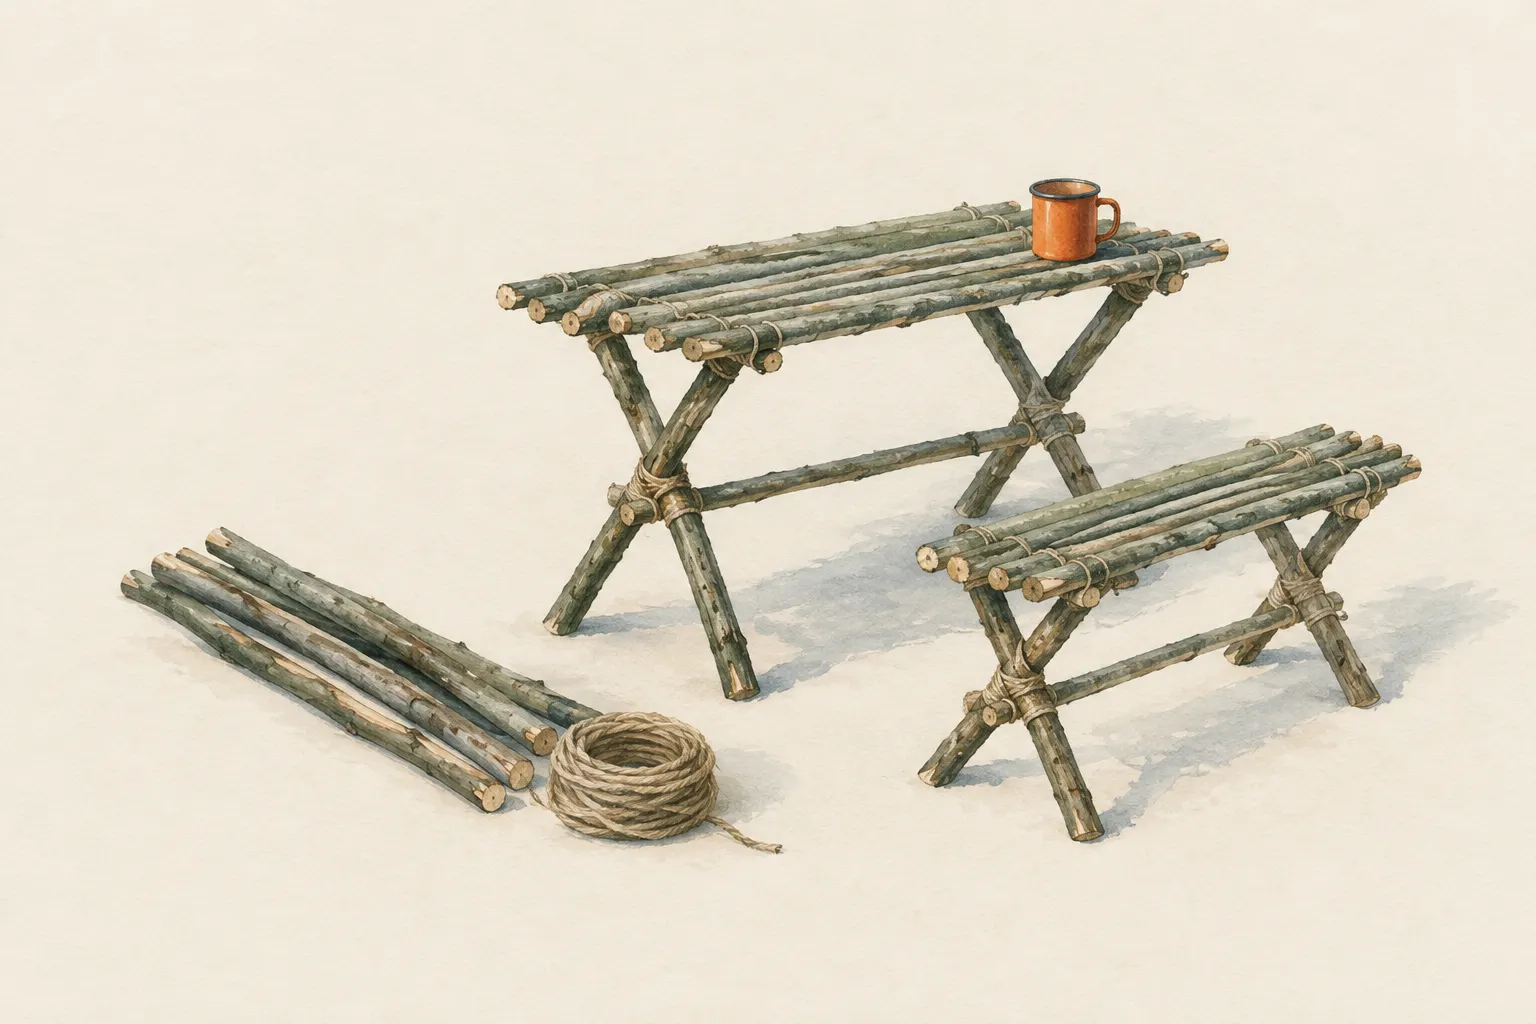
With straight dead-wood poles and cord you can lash a simple table or bench without nails: two trestles of crossed poles, joined by cross bars, with a layer of thin poles as the surface. This gets cooking, washing up and tools off the ground – and can be taken apart without a trace when breaking camp.
- 1–2 hours with material at hand
Explained simply
In camp everything usually lies on the ground: pots, plates, knives, bread. Soil, ants and needles soon get on them. A table made of poles helps. You build it without any nails, just with wooden poles and cord. The poles are tied together with tight wrappings – these are called lashings.
Imagine two big X shapes standing side by side. Those are the table legs, called trestles. Across the two X shapes you lay long poles, and on top many thin poles close together – and the table top is ready. A slanting pole between the trestles stops everything tipping sideways, just as a triangle makes a shelf stiff.
Most important: use only wood that is already dead and lying on the ground, and only where that is allowed. Check every pole to see whether it is rotten – rotten wood breaks suddenly. And before anyone sits on a bench, it is tested carefully.
How it works
A trestle consists of two poles crossing like an X, joined at the crossing with a square lashing. Two such trestles stand on their own but easily tip sideways, because a rectangle of poles can shift like a parallelogram. Only a diagonal – a pole lashed in at a slant – divides the rectangle into triangles. Triangles cannot change shape unless a pole gets longer or shorter, and that is exactly why the frame then becomes stiff.
A lashing does not hold through the knot but through friction and tension. Many tight turns press the poles together so that they cannot slip. Frapping turns are turns that run between the poles around the whole lashing and pull it together once more. Without them a lashing loosens as soon as the wood gives a little or dries out.
The height of the table top depends on where the legs cross. The higher the crossing point, the higher the table. The long rails lie in the upper fork of the X or are lashed there. On top goes a layer of thin, straight poles, tied at the ends with a continuous cord.
Gear and materials
You need four legs of roughly equal length, two long rails, a diagonal brace and many thin, straight poles for the top. That is a lot of wood, and this is exactly where the limit lies: only fallen deadwood is used, and only where the landowner or local rules allow it. Nothing is cut from living trees. In heavily visited areas a carried folding table is the better choice, because collecting many poles there puts strain on the forest floor.
Jute or sisal twine works well as cord: it grips firmly and rots if a scrap is ever left behind. Even so, every bit of cord is removed when breaking camp. A folding saw helps to cut the poles to length. Work on a stable sawhorse or a firm base and keep a distance from other people.
What really matters
The quality of each single pole decides how safe the structure is. Bend each pole firmly before using it and look for cracks, soft spots and fungal decay. Rotten wood sometimes still looks good from outside but breaks without warning. If a pole creaks or feels spongy, leave it lying.
Lashings only hold if they are wrapped really tight and finished with frapping turns. Pull tight after each turn. After a few hours and again the next morning it is worth checking and tightening all lashings, because wood and cord settle. Without a diagonal brace the table wobbles and can fold sideways.
Test the finished frame step by step: first rock it, then press on it with your hands, then carefully add more weight. A bench is used only once it survives this testing without creaking. This entry gives no load ratings – every structure is different and must be checked yourself.
Safety: what to watch out for
Do not build the table right next to the fire. Dry wood and natural twine catch fire easily, and one spark is enough. A stove goes on a table only if the surface is level and firm and nothing can wobble – a falling pot of hot water causes serious scalds.
When sawing and carving the poles, the normal tool rules apply: guide saw and knife away from the body, keep a distance from others, put tools down covered. Nobody stands on the table or bench to reach anything. Raised lashed structures for people are explicitly not part of this entry.
When it makes sense – and when not
A camp table is worthwhile in base camps over several days, especially for groups. It gets cooking, washing up and tools off the ground, which is cleaner and easier on the back. It is also excellent practice for square and diagonal lashings. As a small variant, thin poles make a sloping rack on which washed dishes can drain.
For a single night the effort of one to two hours is not worth it. Where collecting wood is forbidden or there is hardly any deadwood, nothing is built. Lashed camp structures – known as pioneering – have long been part of scout training. Part of that tradition is removing all cord when breaking camp and scattering the wood naturally again.
Step by step
Gather material
Four legs of equal length, two long rails, one diagonal brace and many thin, straight poles for the top – only fallen deadwood where permitted.
- 1
Gather material
Four legs of equal length, two long rails, one diagonal brace and many thin, straight poles for the top – only fallen deadwood where permitted.
- 2
Lash the trestles
Cross two legs in an X and join them with a square lashing. The height of the crossing sets the table height.
- 3
Add the rails
Stand both trestles up and lay or lash a long rail into the fork on each side.
- 4
Brace diagonally
Fix a pole diagonally between the trestles with diagonal lashings so the frame cannot fold sideways.
- 5
Lay the top
Lay thin poles tightly side by side across the rails and tie them at the ends with a continuous cord.
- 6
Test and dismantle
Rock it, increase the load gradually and tighten the lashings. When breaking camp remove all cord and scatter the wood.
Common mistakes
- Using rotten poles
- No diagonal brace
- Lashings without frapping turns – they loosen
- Leaving scraps of cord in the woods
Quick view
Materials
Sturdy sticks / poles
Straight, sound dead-wood poles
Do not cut live wood where prohibited.
Jute or sisal twine (bought)
Natural twine that rots if scraps are left
Low strength, absorbs water and rots – light loads and practice only.
Folding saw
Fold or cover the blade after use; saw teeth are very sharp.
Suitable for
- Group and base camps
- A cooking area off the ground
- Lashing practice
Not suitable for
- One-night camps – not worth the effort
- Areas where collecting wood is forbidden
- As a seat or step for loads beyond what was tested
Prerequisites
- Able to tie square and diagonal lashings reliably
- Permission to use deadwood
- A camp for several days
Safety
- Rotten poles break without warning. Bend and check every pole for cracks and soft wood before using it; load the finished bench carefully before sitting on it.
- Do not build a table right next to the fire – dry wood and twine catch fire easily.
How it works
A trestle of two crossed poles lashed at the middle stands firmly when two of them are joined by a long pole and a diagonal brace stops them racking. Triangles stiffen the frame; lashings hold through friction and tension, not through knots alone.
Advantages
- More hygienic cooking and work area
- No nails or tool marks on trees
- Good lashing practice
Disadvantages
- Needs a lot of suitable deadwood
- Time-consuming
- Not permitted everywhere
Deep knowledge
Background
Lashed camp structures ("pioneering") have long been part of scout training; scout handbooks describe square and diagonal lashings as the foundation.
In heavily used areas collecting many poles burdens the forest floor. There a carried folding table is the better choice.
Variants
- Bench
- Same construction, lower and with stronger poles for the seat.
- Dish rack
- A small sloping rack of thin poles lets washed dishes drain.
Common mistakes
- Using rotten poles
- No diagonal brace
- Lashings without frapping turns – they loosen
- Leaving scraps of cord in the woods
Limits and risks
- No load ratings – test every structure yourself
- No raised structures for people
Material alternatives
Derived from material properties: a substitute must have all relevant properties. Observe the notes on the substitute.
- Jute or sisal twine (bought)
- Rope (Never use unknown or damaged rope for life-safety purposes.), Paracord (Not a climbing or safety rope.), Thin twine (Low breaking strength – light loads only.), Accessory cord (Use only certified cord after training for life-safety purposes.), Webbing (tubular webbing) (Inspect knotted webbing before every use.), Tree straps (Load only within the manufacturer's limits.)
Results come exclusively from structured entries. No improvised instructions are generated.
Sources
Boy Scouts of America: Scouts BSA Handbook
Square and diagonal lashings, lashed camp structures
Leave No Trace Center for Outdoor Ethics: The Seven Principles of Leave No Trace (Principle 5: Minimize Campfire Impacts)
Camp on durable surfaces, leave what you find