Sawing on a sawhorse – improvised too
A sawhorse holds wood at a comfortable height and supported so that the cut opens rather than pinching the blade. This spares your back and the saw and keeps the free hand out of the danger zone. In camp an improvised horse made from two crossed pairs of poles or a lying log is enough.
- Improvised horse 20–30 minutes
Explained simply
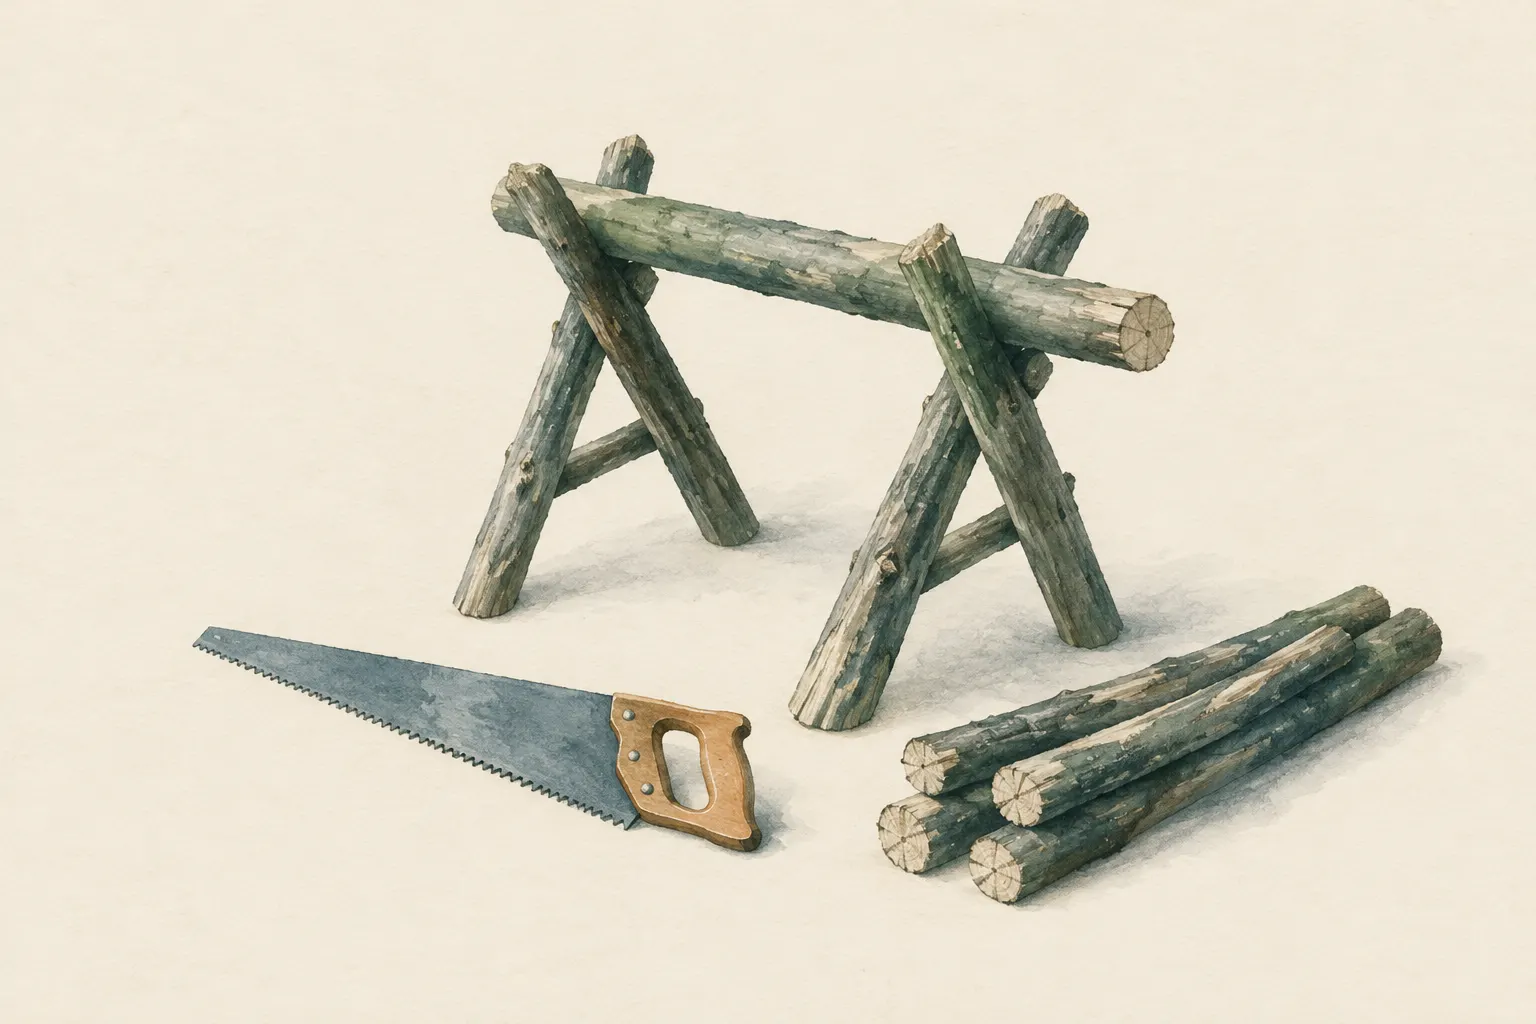
A sawhorse is a stand on which you lay wood so that it stays put while you saw and is at a comfortable height. That way you do not have to bend down low, and your free hand stays well away from the blade. In camp you can build such a horse yourself from four poles.
The secret lies in where you saw. If you saw a piece right between two supports, it bends down in the middle and pinches the saw – like a bridge that sags. If instead you saw the part sticking out beyond the horse, it hangs down and the cut opens like a mouth. Then the saw runs easily.
For safety: keep your free hand well away from the blade, and watch your feet, because cut-off pieces drop. Sturdy shoes help. Only use dead wood where that is allowed, or ask the owner.
How it works
Wood resting on two points sags slightly in the middle under its own weight. It is compressed at the top and stretched at the bottom. If you saw from above right into that middle, the cut squeezes together and pinches the blade. The saw gets stuck, you push harder, and the blade can bend or jump out.
If instead the wood overhangs the support, the free end hangs down. Then the cut is pulled apart at the top and opens by itself. So the horse decides where the load sits – and therefore whether the saw runs freely. That applies not only to a sawhorse but to any wood you rest on something.
An X-horse is made of two pairs of poles, each crossed into an X and lashed. The upper forks of the X hold the wood, and a cross pole lower down joins the two Xs so that they do not tip apart.
What really matters
The horse must stand firmly. Lash the crossings tightly with a square or shear lashing, set the two Xs about half a metre apart, and the low cross pole stops it from wobbling. A wobbly horse is more dangerous than none at all. On uneven or slippery ground, find a better spot. As a simple alternative, a thick lying log can serve as the support.
Start the cut with two or three light back strokes until a small groove forms. Then saw with long, steady strokes, using as much of the blade's length as possible. There is no need to press – the teeth do the work. Pressing tires you faster and is more likely to bend the blade.
Near the end, lightly support the overhanging piece so that it does not break off early and splinter. The free hand holds the wood on the side of the horse that does not fall away, well clear of the cut.
Safety: what to watch out for
A typical sawing injury happens when the saw jumps while starting the cut and hits the hand beside it. So do not use your thumb as a guide right next to the blade; start the cut with careful back strokes. A cut-resistant glove on the holding hand can help as well.
Cut-off pieces drop. Keep your feet out of the drop zone and wear sturdy footwear. Very thick logs do not belong on an improvised horse, because it can tip over.
When two people work together, one saws and the other holds the long end at a distance. Agree beforehand who gives which commands. Nobody helps with a hand near the blade. A first-aid kit is within reach; with heavy bleeding, press firmly on the wound and call the local emergency number (112 in the EU).
When it makes sense – and when not
A horse is worth it when you want to saw more than a few pieces, for example when making firewood for several days in camp. It spares your back, the saw and your hands. For two or three thin branches, a lying log or snapping them by hand is often enough.
Only saw wood you are allowed to use: dead wood where permitted, or wood with the landowner's permission. Living trees stay standing. Also check local rules for the fire you need the wood for. When leaving camp, take the horse down, undo the lashings and scatter the poles again.
Good to know
Sawhorses have been used for cutting firewood for centuries, and the principle is the same everywhere: wood firm, hands away from the blade, load placed so that the cut opens. Once you have understood this principle, you immediately see why a saw binds and can reposition the wood accordingly.
Look after your saw too: a clean, dry blade with sharp teeth works much more easily. Fold folding saws straight after use so that nobody reaches into the teeth.
Step by step
Build the horse
Cross two pairs of poles into an X each and lash them (square or shear lashing), set them up about half a metre apart and join them low down with a cross pole. Alternatively use a thick lying log as a support.
- 1
Build the horse
Cross two pairs of poles into an X each and lash them (square or shear lashing), set them up about half a metre apart and join them low down with a cross pole. Alternatively use a thick lying log as a support.
- 2
Load the wood
Lay the wood in the forks so that the part to be cut off overhangs the end freely.
- 3
Start the cut
Make a kerf with two or three light back strokes, then saw with long, steady strokes. Do not force it – the teeth do the work.
- 4
Finish cleanly
Near the end lightly support the overhanging piece so it does not tear off and splinter.
- 5
Take down
Fold the saw, dismantle the horse and undo the lashings when leaving camp.
Common mistakes
- Sawing between two supports so the blade binds
- Using the thumb as a guide right by the blade
- Forcing the saw
- Using a wobbling horse
Quick view
Materials
Folding saw
Fold or cover the blade after use; saw teeth are very sharp.
Sturdy sticks / poles
Four sturdy poles for an X-horse
Do not cut live wood where prohibited.
Rope
To lash the crossings
Never use unknown or damaged rope for life-safety purposes.
Cut-resistant glove
Reduces cuts but does not prevent stab injuries.
Suitable for
- Cutting firewood to length
- Longer work sessions in camp
- Working in pairs with clear roles
Not suitable for
- Very thick logs – risk of tipping
- Uneven, slippery ground
- Live wood where cutting is prohibited
Prerequisites
- Saw in good condition
- Basic rules from "Using a saw and hatchet safely"
- Optional: square lashing
Safety
- The free hand holds the wood well away from the cut, ideally on the side of the horse that does not fall away. Start the cut with a few back strokes rather than using the thumb as a guide.
- Cut-off pieces drop – keep feet out of the drop zone and wear sturdy footwear.
How it works
If a piece is sawn between two supports it sags in the middle and pinches the blade. If instead you saw the overhanging part outside the support, it hangs down and opens the cut. The horse therefore decides where the load sits – and so whether the saw runs freely.
Advantages
- Back-friendly working height
- Less binding, longer saw life
- Hands stay away from the blade
Disadvantages
- Setting up takes time
- Improvised horses can tip over
Deep knowledge
Background
Sawhorses have been standard for cutting firewood for centuries. Bushcraft textbooks describe how to cut wood efficiently and safely in camp with a saw and simple pole structures.
Compared with a hatchet the saw is quieter, more controlled and suitable for beginners – a horse makes it safer still.
Variants
- Sawing in pairs
- One person saws, the other holds the long end at a distance; agree on commands beforehand. Never help with a hand near the blade.
Common mistakes
- Sawing between two supports so the blade binds
- Using the thumb as a guide right by the blade
- Forcing the saw
- Using a wobbling horse
Limits and risks
- Only for manageable pieces
- Improvised lashings are not meant for load-bearing structures
Material alternatives
Derived from material properties: a substitute must have all relevant properties. Observe the notes on the substitute.
- Rope
- Paracord (Not a climbing or safety rope.)
Results come exclusively from structured entries. No improvised instructions are generated.
Sources
Mors L. Kochanski – Lone Pine Publishing: Bushcraft: Outdoor Skills and Wilderness Survival
Working with a saw in camp
Ray Mears – Hodder & Stoughton (2002): Bushcraft
The saw as a camp tool