Tarp lean-to
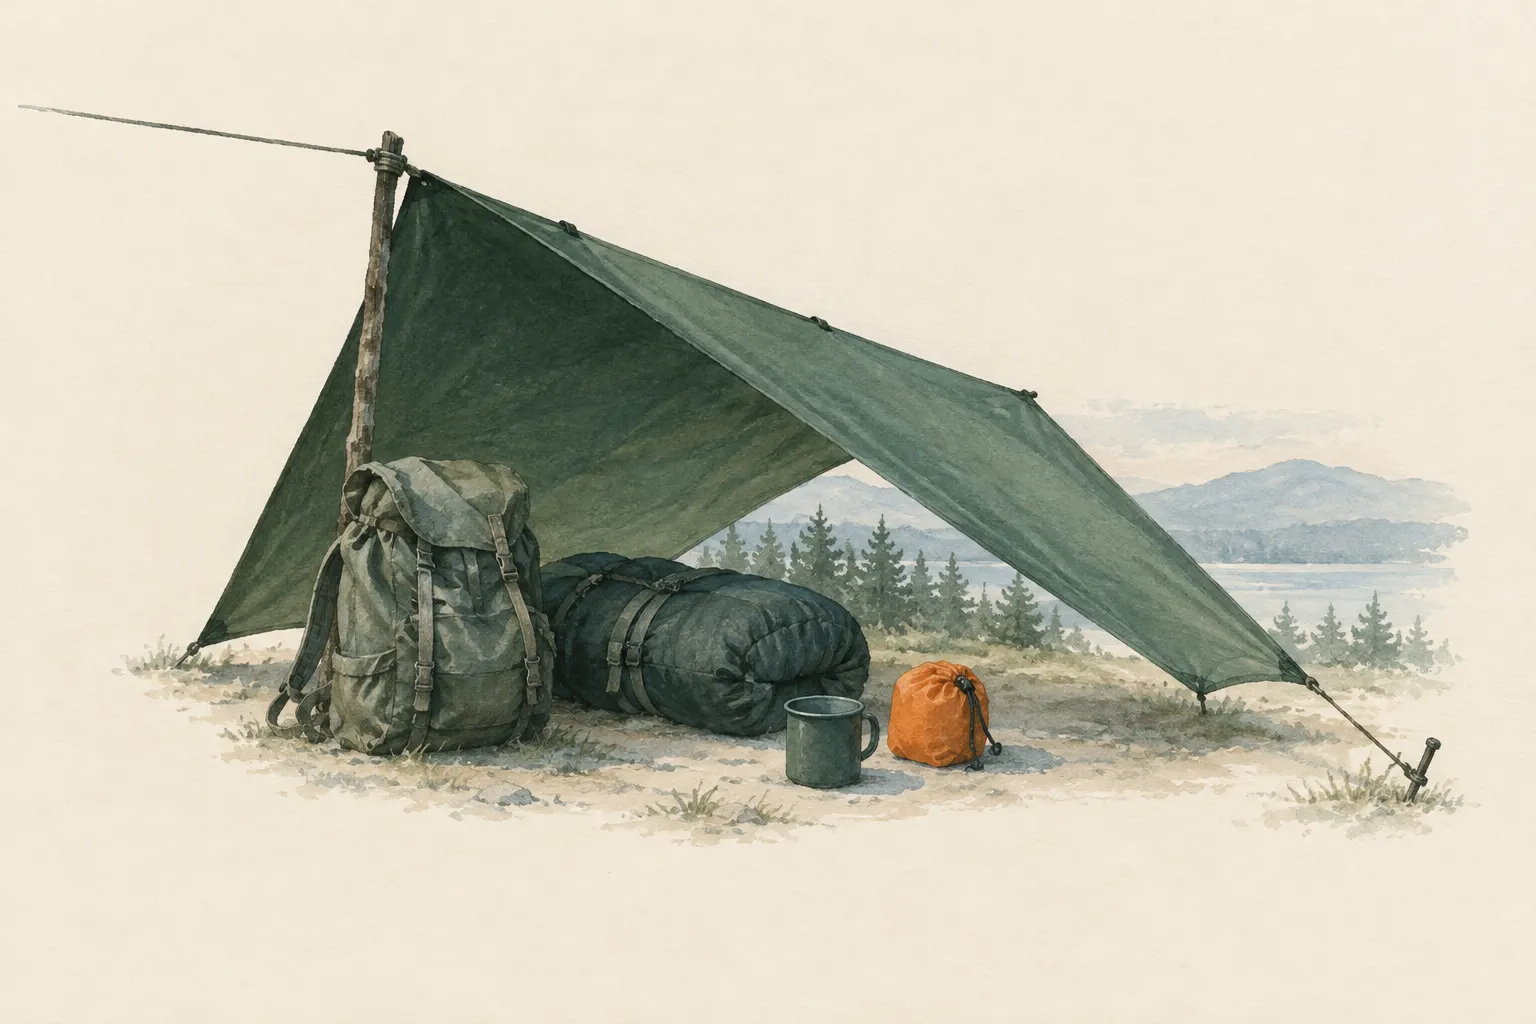
One edge of the tarp is raised on a ridgeline and the opposite edge staked to the ground on the windward side. The lean-to offers plenty of room and an open view but protects only as long as the wind keeps coming from the expected direction.
- 10–20 minutes
Explained simply
A lean-to is a sloping wall made from a tarp – like a board leaned at an angle against a wall. At the top, one edge of the tarp hangs from a line between two trees; at the bottom, the other edge is fixed to the ground.
The sloping side faces the wind. Wind and rain hit the back and slide over it. The front stays completely open: you have plenty of room, fresh air and a good view.
The catch: this only works as long as the wind comes from behind. If it shifts, it blows straight into the open side. So keep checking the wind and know how to re-pitch quickly. Fires and stoves never belong under the tarp.
How it works
In a lean-to the tarp forms a single sloping surface. The high edge hangs from a ridgeline across the wind; the low edge is staked to the ground on the windward side. Wind and rain hit the slope and are deflected over it. Behind it, in the so-called lee – the side facing away from the wind – a calm area forms.
The angle decides how well this works. The flatter the tarp runs towards the ground, the better the wind protection, but the less room remains underneath. The steeper it stands, the more room you have, but the more wind and rain can swirl in from the sides and above.
Because the front is open, fresh air flows through constantly. That is why hardly any condensation forms under a lean-to – a real advantage on damp nights.
What really matters
Everything depends on the wind direction. Do not check it only once – watch it for a while: from smoke, leaves, grass or by holding up a moistened finger. Ask yourself whether it will hold. In many landscapes, winds shift in the evening and at night – in mountains because of slope and valley winds, on coasts because sea breeze and land breeze swap.
The low edge should be staked out as gap-free as possible. Otherwise wind whistles through gaps under the edge straight onto your sleeping spot. With a large tarp you can fold the side sections forward and stake them out; that slows side wind but costs area.
As with any tarp: tension it tightly so no water pools in sags, and put a sleeping pad in the sheltered area.
When it makes sense – and when not
The lean-to is ideal for breaks, calm weather with a steady wind, light rain and whenever plenty of room and a clear view matter more than all-round protection. It is quick to pitch and well suited to beginners.
It is unsuitable in shifting or gusty winds, heavy driving rain and exposed places. An A-frame is then the more robust choice, because it protects from two sides.
So plan from the start: how would I convert this tarp into an A-frame if the wind shifts? Knowing that in advance lets you react in good time instead of improvising in the rain in the middle of the night.
Safety: what to watch out for
Here too: only healthy, living trees as anchors, and look for dead branches first. The ridgeline only carries the roof and must never be used to secure or hold people.
The open front tempts people to make a fire in front of it. That is tricky: sparks and smoke can be drawn into the tarp, and many tarp fabrics melt or burn. If at all, then only at a large distance, only where fires are allowed, and respecting local fire bans. Never run a stove under the tarp.
The lean-to does not insulate from the ground and does not keep out insects. For the night you therefore still need a sleeping pad and, depending on the area, insect protection.
How to practise it
Pitch the lean-to on a windy day in a park or garden and try different angles. Sit underneath and feel how the wind protection changes when the edge is lower or higher.
Then practise converting it into an A-frame: the ridgeline stays, the tarp is laid centrally over it and staked out on both sides. Once you have done this a few times, you can manage it in the dark with a headlamp.
On practice trips, watch how the wind behaves over the course of the evening. That trains your sense of when a lean-to is a good choice and when it is not.
Step by step
Determine the wind direction
Check the wind direction and judge whether it is likely to hold. Choose the site so the back of the tarp faces the wind.
- 1
Determine the wind direction
Check the wind direction and judge whether it is likely to hold. Choose the site so the back of the tarp faces the wind.
- 2
Rig the ridgeline
Tension the line between two trees across the wind, with a bowline or clove hitch at one end and a taut-line hitch or two half hitches at the other.
The ridgeline is a roof ridge only – never use it to secure or hold people.
- 3
Attach the high edge
Attach one long edge of the tarp to the ridgeline and secure the corners to the line or the trees with short cords.
- 4
Stake the windward edge
Pull the opposite edge taut to the ground on the windward side and fix it with stakes or sticks. The flatter the angle, the better the wind protection and the less room.
- 5
Seal the edge and ground
Stake the low edge as gap-free as possible so no wind blows underneath. Place a pad or groundsheet in the sheltered area.
- 6
Watch the weather
If the wind shifts, re-pitch in good time – for example as an A-frame – rather than being caught out at night.
Common mistakes
- Turning the open side into the wind
- Checking the wind direction only once
- Leaving gaps under the low edge
- Placing a fire too close to the open side
Quick view
Materials
Tarp
Paracord
For ridgeline and guylines
Not a climbing or safety rope.
Rope
Alternative for the ridgeline
Never use unknown or damaged rope for life-safety purposes.
Tent stakes
Sturdy sticks / poles
As substitute stakes or supports
Do not cut live wood where prohibited.
Trekking poles
As supports for the high edge
Sleeping pad
The tarp does not insulate from the ground
Suitable for
- Steady wind direction
- Breaks with plenty of room to move
- Light rain without strong wind
Not suitable for
- Shifting or gusty winds
- Heavy driving rain
- Exposed locations
Prerequisites
- A tensioning knot and an attachment knot
- A reliable read of the wind direction
Safety
- Use only healthy, living trees as anchors and check for dead branches above before pitching.
- A fire in front of the open side can carry sparks and smoke into the tarp; many tarp fabrics melt or burn. Do not run a stove under the tarp and respect local fire bans.
How it works
The tarp forms a sloping wall with its back to the wind. Wind and rain strike the inclined surface and are deflected over it; the lee side stays open. The protection depends entirely on the wind coming from behind – if it shifts, the open side becomes the exposed face.
Advantages
- Simple to pitch
- Plenty of usable space
- Excellent ventilation, little condensation
Disadvantages
- Protection from one direction only
- Vulnerable to shifting wind
- Little protection from driving rain
Deep knowledge
Background
The lean-to is the most open tarp pitch. It suits breaks, calm weather with a steady wind, and situations where room and view matter more than all-round protection. Thanks to the open front, little moisture collects under the tarp.
Its weakness is its dependence on wind direction. Winds shift at night in many landscapes – for example slope and valley winds in mountains or land and sea breezes on coasts. Anyone pitching a lean-to should know how to convert it quickly into an A-frame. Like any tarp, it does not insulate from the ground.
Variants
- With side wings
- With a large tarp, fold the side sections forward and stake them out. This cuts crosswind at the cost of area.
- With trekking poles
- Raise the high edge on two trekking poles guyed out to the front when there are no trees.
Common mistakes
- Turning the open side into the wind
- Checking the wind direction only once
- Leaving gaps under the low edge
- Placing a fire too close to the open side
Limits and risks
- No protection from ground cold
- No protection when the wind shifts
- No insect protection
Material alternatives
Derived from material properties: a substitute must have all relevant properties. Observe the notes on the substitute.
- Tarp
- Plastic sheet / large bin bag (Tears easily; never pull over the head (suffocation risk).), Emergency blanket (Tears easily once punctured; short-term shelter only.), Document folder (waterproof) (Store securely – contains sensitive personal data.), Rain poncho (When used as a shelter, it no longer protects your body from rain.), Bivy bag (Never fully close off the face.), Tent (Do not cook or heat inside the tent (fire and carbon monoxide danger).), Heavy-duty bin bag (large) (Suffocation risk: never pull plastic bags over the head or face and keep them away from small children.), Group shelter bag (Airtight – ventilate regularly.)
- Paracord
- Rope (Never use unknown or damaged rope for life-safety purposes.)
- Rope
- Paracord (Not a climbing or safety rope.)
- Tent stakes
- Sturdy sticks / poles (Do not cut live wood where prohibited.)
- Trekking poles
- Sturdy sticks / poles (Do not cut live wood where prohibited.), Tent pole repair sleeve (Temporary only – have broken sections replaced at home.)
- Sleeping pad
- Dry leaves, grass or conifer boughs (Collect only where allowed; no protected plants. Check for ticks and insects.), Backpack, Dry spare clothing (Carry it in waterproof packaging – wet clothing barely insulates.), Wool blanket / duvet (Keep away from candles, stoves and heaters.), Insulated cool box (Keeps cold only for a limited time; without ice packs or ice it is not a fridge.), Sleeping bag (Do not store compressed long-term; do not pack away damp.), Newspaper and cardboard (Flammable – keep away from candles, stoves, heaters and embers.), Insulated cooking box (hay box, thermal cooker) (Never put open flame or embers inside – only the hot, closed pot.)
Results come exclusively from structured entries. No improvised instructions are generated.
Sources
Headquarters, Department of the Army (USA) (2002): FM 3-05.70 Survival
Building simple lean-to shelters from sheets