Carving simple camp tools: tent pegs and a pot hanger
With a knife and saw, a piece of dead wood can be turned into spare tent pegs and a simple pot hanger for the fireplace. At their core both need only two basic cuts: a point and a notch. If you know the carving grips, you will have usable results in half an hour.
- Peg about 10–15 minutes, pot hanger about 20–30 minutes
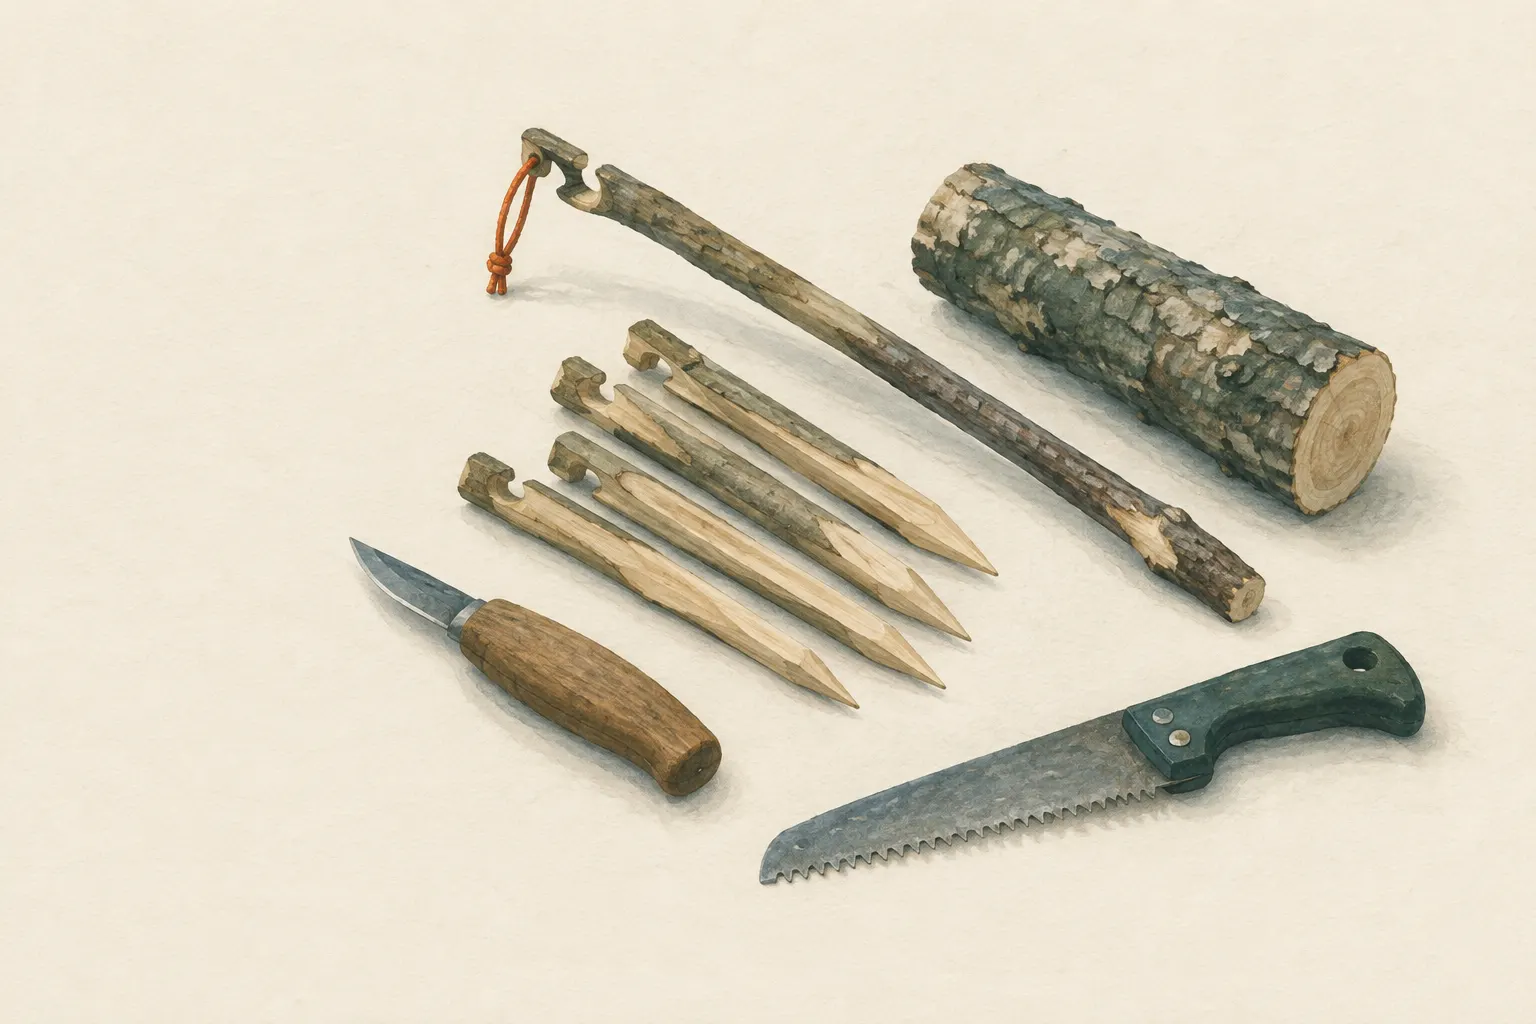
Explained simply
With a knife and a saw you can turn a piece of dead wood into useful things for camp, for example a tent peg when one has gone missing, or a hook to hang a pot over the fire. The nice thing is that you only need two basic cuts: a point and a notch.
A notch is a small step cut into the wood, into which a cord or a pot handle can hook. First you make a straight cut across the wood, the "stop cut", and then you carve at an angle towards it until a little wedge falls out.
For safety: always carve away from your body and never over your leg. Have a first-aid kit ready. Only take wood that is already dead on the ground and may be collected – or ask the owner. Local rules always apply.
How it works
A peg holds in two ways: the point sits in the ground, and the friction of the soil against the wood stops it from being pulled out. The notch keeps the line from slipping off upwards. That is why on a peg the notch faces downwards, towards the point – the line pulls into the notch instead of out of it.
A pot hanger transfers the pot's weight via a hook or notch to a pole or tripod. On a branch with a short side branch, the side branch serves as a natural hook. On a notched stick you cut several notches one above the other and can hang the pot higher or lower – the closer to the embers, the hotter.
The notch itself comes from two cuts: a vertical stop cut that severs the fibres crosswise, and an angled cut that runs up towards it. The stop cut makes sure the angled cut ends exactly where you want instead of tearing further into the wood.
What really matters
The wood decides the result. Sound, dry dead wood without rot or cracks is ideal. Rotten wood crumbles when driven in or breaks under the pot. Freshly cut green wood is easy to carve, but you usually may not cut it at all, and it warps as it dries. For pegs, pieces about thumb to wrist thick and forearm length or shorter work well.
The point should not taper too finely. A very thin point snaps off on the first stone in the ground. A sturdy, rather blunt point is better. The head of the peg should be lightly chamfered all round so that it does not split when you drive it in.
Drive pegs with a wooden club, not the hatchet. In frozen or very stony ground wooden pegs break easily. There, stones on the line or metal pegs brought from home work better.
Safety: what to watch out for
When carving the point, brace the workpiece angled downwards on a firm support, such as a tree stump or chopping block, and carve away from your body. Never work between your knees or over your thigh, and never put the holding hand in front of the edge. The stop cut is often safer with a saw than with a knife. With heavy bleeding, press firmly on the wound and call the local emergency number (112 in the EU).
A wooden pot hanger can char and suddenly give way. Use it only over embers or small flames, check before each use that it holds, and never leave the pot hanging unattended. Boiling water causes severe scalds. Test the hanger first with the empty pot and then with a little water over small embers.
Collecting wood and making fires are restricted or prohibited in many places. Check local rules and wildfire warnings before you even begin.
When it makes sense – and when not
Carved pegs are a good replacement when one gets lost or breaks. They hold reasonably in soft forest soil but less well than metal pegs in hard ground. A wooden pot hanger is handy at a permitted fireplace but does not replace a stove where fires are banned.
In many protected areas and forests cutting wood is not allowed. There, spare pegs brought from home and a stove are the better solution. You can still practise the carving itself – at home with bought wood or with wood the owner has given you permission to use.
How to practise it
Start with a peg. It is small, quick to finish and contains both basic cuts. When making the notch, be careful not to set the stop cut too deep – otherwise the peg becomes too weak at that point and breaks when you drive it in.
Once the pegs come out well, move on to a notched stick with several notches. It trains you to cut the notches evenly and cleanly. Both pieces are good practice for the carving grips you will later need for spoon carving or camp building too.
Step by step
Choose the wood
Use sound, dry dead wood without rot or cracks that is lying on the ground and may be collected. Rotten wood breaks.
- 1
Choose the wood
Use sound, dry dead wood without rot or cracks that is lying on the ground and may be collected. Rotten wood breaks.
- 2
Saw to length
For pegs, pieces about forearm length or shorter; for the pot hanger a longer piece with a fork or a straight piece for several notches.
- 3
Carve the point
Brace the workpiece angled downwards on a firm support and carve the point all round with cuts away from the body. Do not make the tip too fine, or it will break.
Never work between the knees or over the leg.
- 4
Make the notch
About a hand's width below the head, make a vertical stop cut with a saw or knife, then carve at an angle up towards it until a wedge comes out. For a peg the notch faces downwards so the line cannot slip off.
- 5
Finish the pot hanger
Forked-branch version: trim a branch with a short side branch so that the side branch serves as a hook for the pot handle; at the top, a notch or loop for hanging. Notched-stick version: several notches one above the other allow different heights above the embers.
- 6
Test
Drive pegs in carefully (with a wooden mallet, not the hatchet) and check their hold. Load the pot hanger first with an empty pot, then with a little water over small embers.
Common mistakes
- Using rotten or green, freshly cut wood
- Carving the notch facing upwards so the line slips off
- Making the point too fine
- Using the pot hanger over high flames
- Carving towards the body
Quick view
Materials
Knife (fixed or locking blade)
Cut away from your body.
Rules on carrying knives differ by region – check local rules.
Folding saw
Fold or cover the blade after use; saw teeth are very sharp.
Sturdy sticks / poles
Sound, dry dead wood, about thumb to wrist thick
Do not cut live wood where prohibited.
Cut-resistant glove
Reduces cuts but does not prevent stab injuries.
Suitable for
- Replacing lost or broken tent pegs
- Hanging a pot over the fireplace
- Practice pieces for beginner carvers
Not suitable for
- Frozen or very stony ground (wooden pegs break)
- Living trees or protected areas as a wood source
- Heavy pots over large flames
Prerequisites
- Safe handling of knife and saw
- Permission to use dead wood at this location – check local rules
Safety
- A wooden pot hanger can char and give way. Use it only over embers or small flames, check its hold before each use and never leave the pot hanging unattended – boiling water causes severe scalds.
- Collecting wood and making fires are restricted or prohibited in many places. Check local rules and wildfire warnings.
How it works
A peg holds through friction in the ground and a notch that stops the line slipping off. A pot hanger transfers the pot's weight via a hook or notch to a pole or tripod. Both pieces come from the same basic cuts: a point, carved with controlled cuts away from the body, and a notch made from a vertical stop cut and an angled cut running into it.
Advantages
- Needs only knife, saw and dead wood
- Good practice for basic cuts
- Replaces lost equipment
Disadvantages
- Wooden pegs hold less well than metal pegs in hard ground
- Wooden pot hangers can char
Deep knowledge
Background
Pegs, pot hooks and tripods are classic practice pieces in bushcraft teaching. Mears and Kochanski describe such camp aids as examples of how a few basic cuts – point, notch, stop cut – solve many tasks.
In many protected areas and forests cutting wood is not allowed. There, spare pegs brought from home and a stove are the better solution; the carving techniques can be practised at home with bought wood.
Variants
- Tripod instead of crossbar
- Three poles tied together at the top form a tripod from which the pot hanger hangs. Check its stability before use.
Common mistakes
- Using rotten or green, freshly cut wood
- Carving the notch facing upwards so the line slips off
- Making the point too fine
- Using the pot hanger over high flames
- Carving towards the body
Limits and risks
- No wood species identification
- No load-bearing figures
- Only with permission to use the wood
Sources
Ray Mears – Hodder & Stoughton (2002): Bushcraft
Basic cuts and simple camp aids
Mors L. Kochanski – Lone Pine Publishing: Bushcraft: Outdoor Skills and Wilderness Survival
Notches, pegs and pot hangers