Tripod and pot crane over the fire
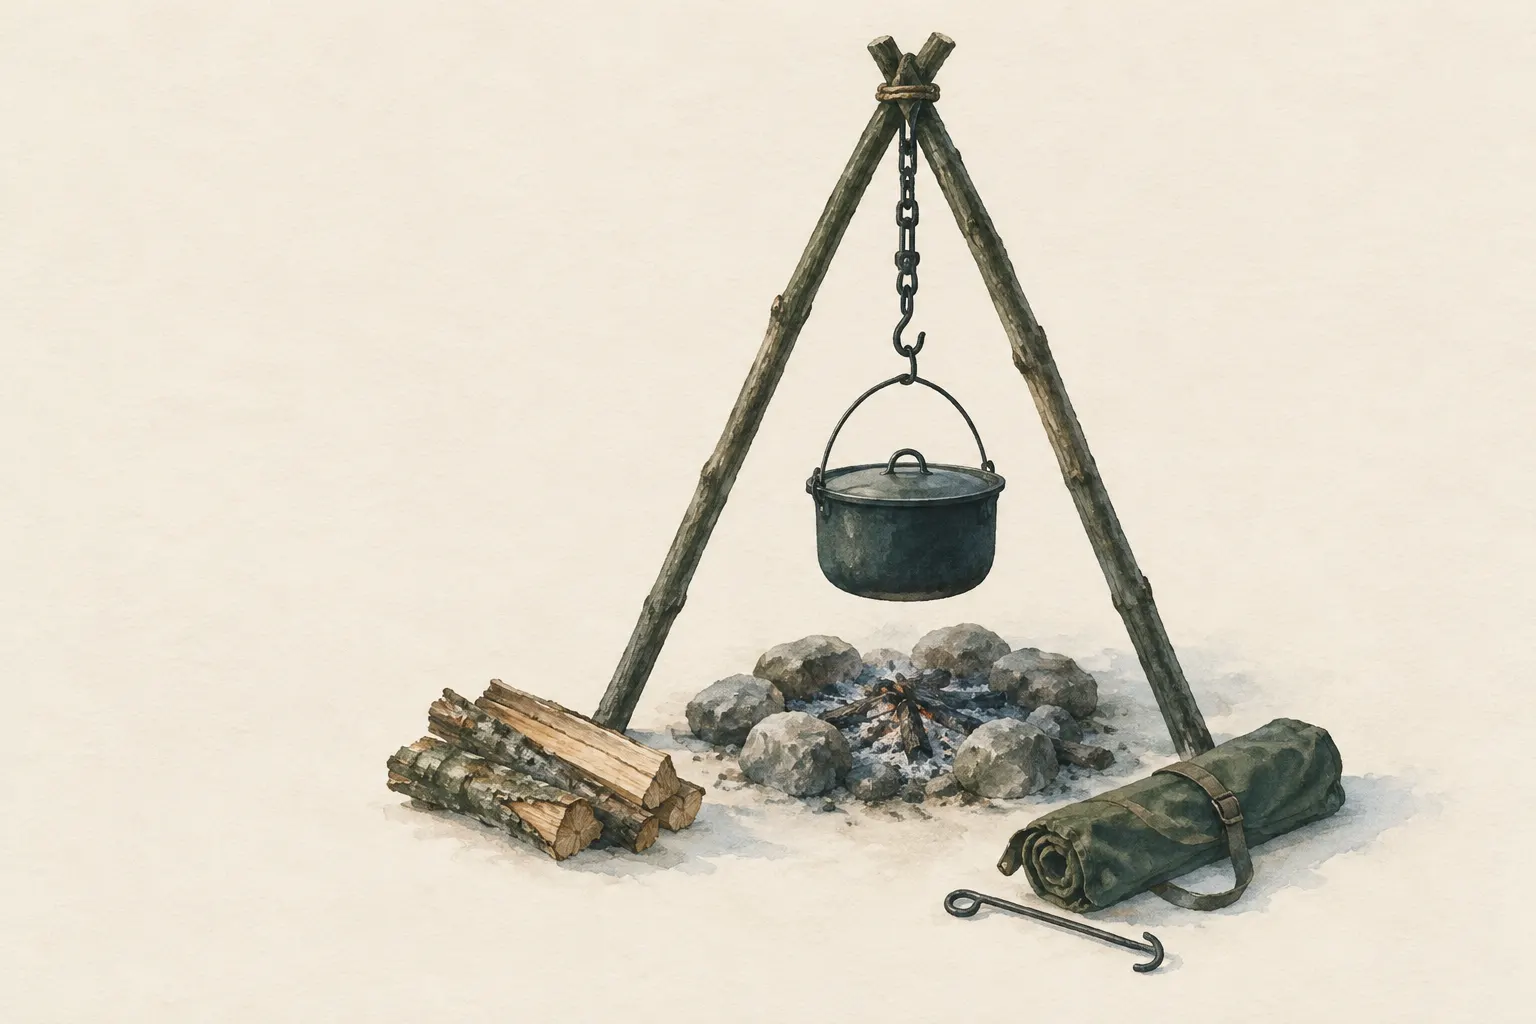
A tripod made of three poles or an angled pot crane hangs a pot over the fire without standing it in the embers. With an adjustable hook the height – and so the heat – can be regulated. Stability, keeping the poles away from the flames and a secure pot handle are what matter.
- 30–45 minutes with poles at hand
Explained simply
Picture a stool with three legs. It never wobbles, not even on uneven ground. A tripod over the fire uses exactly that: three poles are tied together at the top and spread apart at the bottom, and a pot hangs in the middle from a cord or hook.
That way the pot does not stand directly in the embers, where it could tip over. And you can control the heat: hang the pot lower and it gets hotter; hang it higher and it cooks more gently. Another option is the pot crane – a long, angled branch that reaches out over the fire.
For safety: a tipping pot of boiling water can cause serious scalds. Test the tripod before you hang the pot over the fire, and keep children and animals away. Only make a fire where it is allowed – check local rules.
How it works
Three points always lie in one plane. That is why a three-legged stand sits on any ground without rocking, while a four-legged one often wobbles. The weight of the pot at the crossing point is spread across all three legs. As long as the feet stand firm and do not slide, the legs cannot shift against each other.
A pot crane works differently: it is a lever. A long, strong branch lies at an angle over the fire. At the front it rests on a forked stick that acts as the pivot, and at the back it is weighed down with stones or fixed under a peg in the ground. The pot pulls down at the front end, and the rear end holds against it.
You regulate the heat through height. An adjustable hook – a stick with several notches or short side branches – lets the pot hang higher or lower depending on the notch. Close to the embers water boils faster; higher up, food just stays warm without burning.
What really matters
The poles must be strong, dry and sound, about chest to shoulder high and roughly the same length. Rotten or very thin wood can break under the weight of a full pot. Lay the three poles side by side, join them near the top with a tripod lashing, stand them up and spread the legs evenly.
The lashing is the weak point above the fire. Synthetic cord melts, natural fibre chars – either can break. That is why the lashing sits well above the flame, and in the hot zone directly above the pot a piece of chain or a wire hook replaces the cord. The poles themselves must not reach into the flame.
The pot needs a firm bail handle. Before use, load the tripod with the filled but cold pot and shake the legs. Only when everything stands steady do you place it over the fire.
Safety: what to watch out for
A tipping pot of boiling water causes serious scalds. So keep children and animals away from the fire, never leave the pot unattended and only lift it off the hook with a glove or a stick. The bail gets very hot over the fire. For large scalds, call the local emergency number (112 in the EU).
Check the lashing regularly while the fire is burning – charred cord can break without warning. Do not stand the tripod on loose ground where a leg can sink or slide. In windy places with flying sparks, it is better not to make a fire at all.
Local rules decide whether and where open fires are allowed. With a fire ban or high wildfire risk, the fire stays unlit. After cooking, put it out completely, take the tripod down, take the cord with you and scatter the wood.
When it makes sense – and when not
A tripod is handy in group camps with a fixed, permitted fire site, where water is boiled or food kept warm over a longer time. A pot crane is quicker to build when a suitable long branch and a forked stick are at hand.
Both structures take more time than a stove. Where open fires are banned or it is very windy, a stove is the better choice. Improvised stands are not meant for very heavy pots. For the poles: only dead wood where allowed, or with the landowner's permission.
Good to know
Tripods and pot cranes are among the classic camp structures described in scouting and bushcraft handbooks. They combine two basic skills: lashings with cord and carved notches. So building a tripod lets you practise both at once.
Even if you may not make a fire, the tripod is good practice. You can build it in a garden or on permitted ground and hang a lantern or a water bag from it, for example.
Step by step
Choose poles
Three dry, straight dead-wood poles about chest to shoulder high. Avoid damp, rotten poles.
- 1
Choose poles
Three dry, straight dead-wood poles about chest to shoulder high. Avoid damp, rotten poles.
- 2
Lash the tripod
Lay the poles side by side and join them near the top with a tripod lashing. Then stand them up and spread the legs evenly.
- 3
Hang an adjustable hook
Hang a cord from the crossing point and attach a stick with several hooks or notches to it. Depending on the notch the pot hangs higher or lower.
- 4
Test
Before use load it with the filled, cold pot and shake the legs. Only then place it over the fire.
- 5
Alternative: pot crane
Lay a long, strong branch at an angle over the fire, weigh down the rear end with stones or fix it under a peg in the ground and support it at the front on a forked stick.
- 6
Take down
Dismantle after the fire is out, take the cord with you, scatter the wood.
Common mistakes
- Poles too thin or rotten
- Lashing close to the flame
- Hanging the pot without testing
- Legs on loose ground
- Plastic cord directly above the fire
Quick view
Materials
Sturdy sticks / poles
Three sturdy dead-wood poles of about equal length
Do not cut live wood where prohibited.
Rope
Natural fibre chars, synthetic melts – keep the lashing well above the flame
Never use unknown or damaged rope for life-safety purposes.
Metal pot (stainless steel, aluminium, titanium)
With a firm bail handle
Hot – scalding risk.
Folding saw
Fold or cover the blade after use; saw teeth are very sharp.
Suitable for
- Boiling water and simple meals over an open fire
- Keeping food warm at a distance from the embers
- Group camps with a fixed fire site
Not suitable for
- Areas with a fire ban or high wildfire risk
- Very heavy pots
- Windy locations with flying sparks
Prerequisites
- A permitted, safe fire site
- Tripod lashing
- Carving notches (see carving camp tools)
Safety
- Poles and lashing must not reach into the flame. Check the lashing regularly – charred cord breaks.
- Local rules decide whether and where open fires are allowed – check beforehand.
How it works
Three poles form the most stable simple base: the load at the crossing point is spread over three legs that cannot shift against each other as long as the feet are firm. A pot crane instead uses an angled branch anchored in the ground as a lever – the load pulls at the end while a forked stick or stone holds the pivot.
Advantages
- Heat adjustable by height
- Pot does not sit in the fire or tip in the embers
- Made from dead wood
Disadvantages
- More effort than a stove
- Only where open fires are allowed
- Risk of tipping if poorly built
Deep knowledge
Background
Tripods and pot cranes are among the classic camp structures described in scouting and bushcraft handbooks. They combine simple lashings with carved notches.
In many regions open fires are now restricted. A stove is then the alternative; the tripod remains a good exercise in lashing and woodwork.
Variants
- Chain or wire hanger
- A short length of chain or a wire hook brought along replaces the cord in the hot zone and does not burn through.
Common mistakes
- Poles too thin or rotten
- Lashing close to the flame
- Hanging the pot without testing
- Legs on loose ground
- Plastic cord directly above the fire
Limits and risks
- No statement on fire rules for specific places
- Only for ordinary-sized cookware
Material alternatives
Derived from material properties: a substitute must have all relevant properties. Observe the notes on the substitute.
- Rope
- Paracord (Not a climbing or safety rope.)
- Metal pot (stainless steel, aluminium, titanium)
- Single-wall stainless steel bottle (Heat only single-wall bottles without paint/plastic; remove the lid before heating.)
Results come exclusively from structured entries. No improvised instructions are generated.
Sources
Boy Scouts of America: Scouts BSA Handbook
Lashings and simple camp structures
Ray Mears – Hodder & Stoughton (2002): Bushcraft
Cooking over the fire, pot suspensions
USDA Forest Service / Ad Council / National Association of State Foresters: Campfire Safety (Smokey Bear wildfire prevention campaign)
Safe campfire practice