Tarp diamond / plow point (one corner raised)
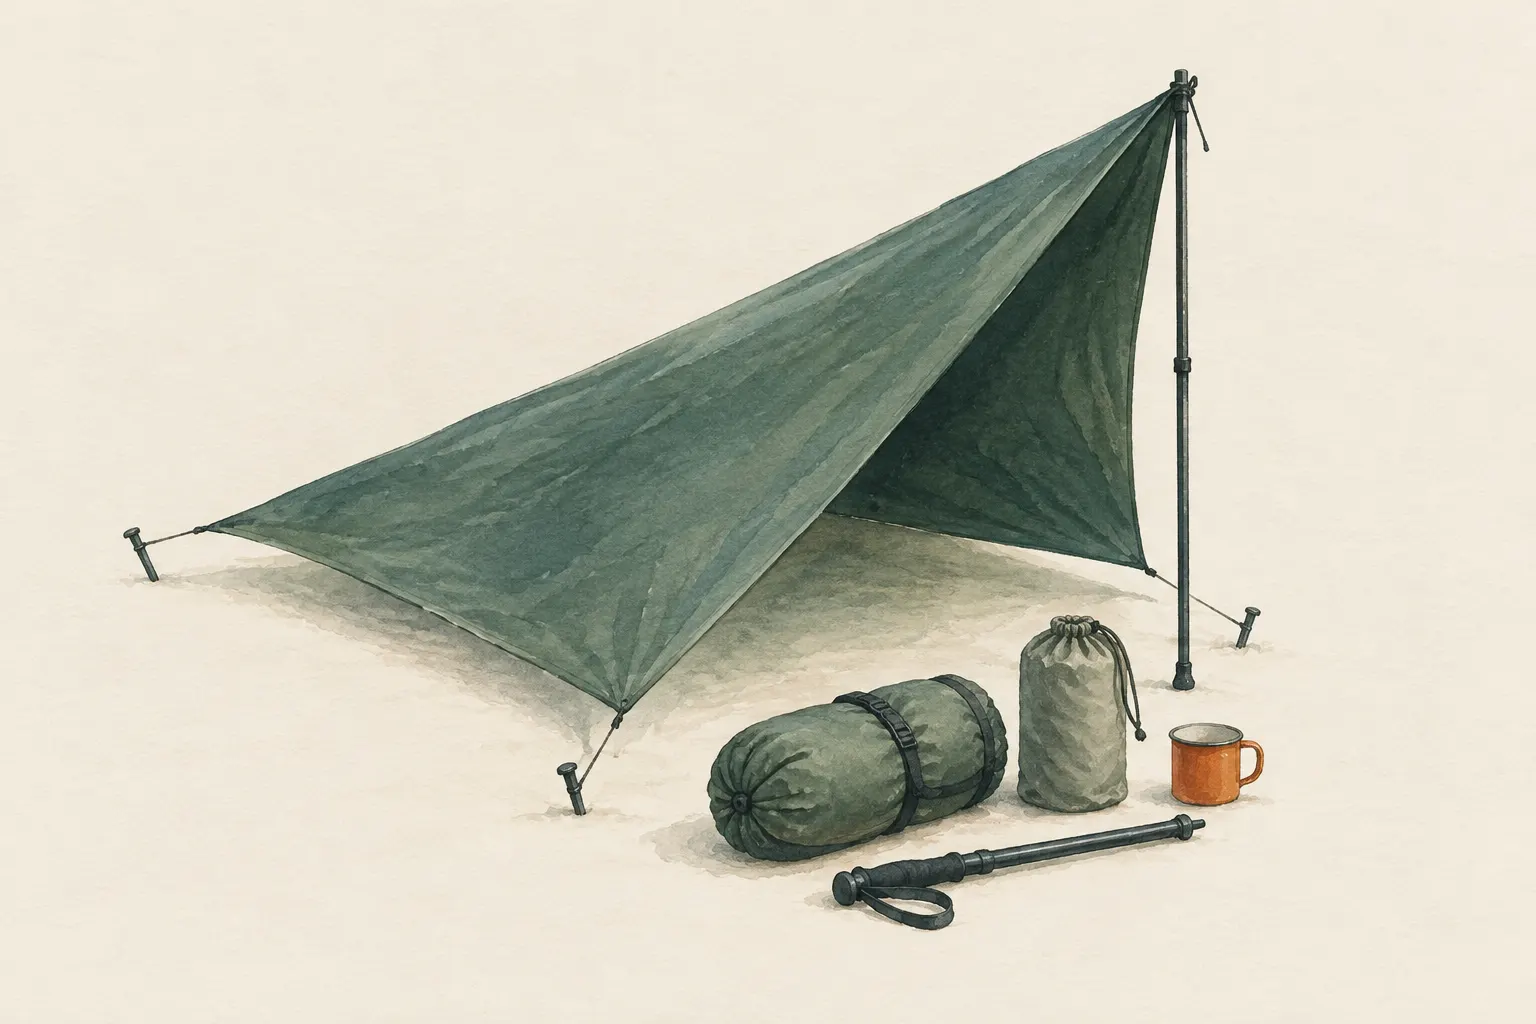
A square tarp is raised at one corner and staked out at the other three. The result is a wedge-shaped one-person shelter that needs only one pole or tree and shields well when its low point faces the wind. The names "diamond" and "plow point" are not used consistently in the literature.
- About 10–20 minutes with practice
Explained simply
For the diamond you need a square tarp and just a single tree or pole. You pull one corner of the sheet up and tie it in place. The other three corners are staked to the ground. The result is a narrow, pointed wedge – a bit like a half-open book standing at an angle on a table.
The low point faces the wind, just as the bow of a boat cuts through the water. The wind sweeps over the tarp, and you lie sheltered behind it. The entrance is at the high end, where it is calm.
The diamond is small and really meant for one person. It only protects well if the wind comes from one direction. And as with every tarp, you need a sleeping pad underneath and you look for dead branches above you first.
How it works
In the diamond, the diagonal of the square tarp forms the ridge. It runs at an angle from the high corner at the tree or pole down to the low corner on the ground. The two side corners pull the panels outwards, creating a narrow wedge that gets flatter and flatter towards the low point.
The low, closed point faces the wind. The wind meets a flat, sloping surface and is guided over it. On the other side, in the lee, is the entrance. It is calmer there, and you can get in and out.
Because the sleeping area runs along the diagonal, you use the longest distance across the square. Even so, the tarp has to be big enough for your body length – there is no fixed size, because it depends on your height and the shape of the tarp.
What really matters
First work out where wind and rain are coming from and stake the corner that points that way firmly into the ground. Only then raise the opposite corner. That way the orientation is right from the start.
The height of the high corner is a compromise: about sitting to chest height is usual. The lower it is, the more sheltered but the more cramped. If it is too high, rain blows in through the entrance. Stake the side corners outwards and slightly backwards until the panels are smooth.
Finally, lie underneath as a test: are your head and feet covered? Where would a puddle form under you in rain? Tighten the tensioning hitches if the material stretches.
When it makes sense – and when not
The diamond is ideal when only one tree, post or pole is available as an anchor point. It needs few staking points and protects a single person with little gear well against wind from a predictable direction. A trekking pole under the high corner can replace the tree; the corner is then additionally guyed forward with a line.
It is unsuitable for groups, in strongly shifting wind and for long stays with a lot of gear. If the wind shifts, the entrance is suddenly exposed to the weather. Headroom is limited.
In the “flying diamond” the side corners are guyed out a little above the ground instead of staked to it. That gives more room and ventilation but less protection from side wind – this form is mainly used as a roof over a hammock.
Safety: what to watch out for
Look up before pitching. Dead trees and broken or hanging branches can fall without warning in wind or under snow or ice load. Use only healthy, living trees as anchors.
No stove, candle or fire under or directly next to the tarp. Synthetic material melts and burns, and carbon monoxide can collect especially under such a low, narrow pitch.
Wild camping, bivouacking, collecting material and fires are regulated very differently from region to region. Check the local rules, do not damage living trees and leave the site without a trace. Like any tarp, the diamond replaces neither ground insulation nor a safe site.
Good to know
The names “diamond” and “plow point” are not used consistently in books and guides. Sometimes they mean the same thing, sometimes slightly different shapes. What matters is not the name but the principle: low side into the wind, panels taut.
Pitches using a square sheet have long been part of the basic knowledge of improvised shelters. Military survival manuals describe comparable forms using a poncho or parachute cloth.
Practise pitching it once in a garden or park: decide where the wind is coming from, pitch it, lie underneath and then imagine the wind turning by 90 degrees – you immediately see why orientation matters so much.
Step by step
Determine the wind direction
Work out where wind and rain are coming from. The low corner points that way.
- 1
Determine the wind direction
Work out where wind and rain are coming from. The low corner points that way.
- 2
Fix the low corner
Stake the corner that faces the wind firmly into the ground.
- 3
Raise the high corner
Tie the opposite corner to a tree or pole at about sitting to chest height. The lower, the more sheltered and the more cramped.
- 4
Stake the side corners
Stake both side corners outwards and slightly backwards until the panels are smooth.
- 5
Re-tension and check
Smooth out wrinkles, tighten the hitches, lie under the tarp and check that feet and head are covered.
Common mistakes
- Point not turned into the wind
- High corner too high – rain blows in
- Tarp too small for body length along the diagonal
- Not considering where puddles will form under the sleeping area
Quick view
Materials
Tarp
A square tarp works best
Paracord
For the high corner and guylines
Not a climbing or safety rope.
Tent stakes
Three or more; sticks or rocks as a substitute
Trekking poles
Substitute for a tree at the high corner
Sleeping pad
Suitable for
- A single person with little gear
- Wind from a predictable direction
- Terrain with only one anchor point
Not suitable for
- Groups
- Strongly shifting wind
- Long stays with a lot of gear
Prerequisites
- One tensioning hitch (e.g. taut-line hitch)
- A tree, post or pole for the high corner
Safety
- Wild camping, bivouacking, collecting material and fires are regulated very differently from region to region. Check local rules, do not damage living trees and leave the site without a trace.
How it works
The diagonal of the square forms the ridge: it runs from the high corner down to the ground. The two side corners pull the panels outwards, creating a narrow wedge. The low, closed point faces the wind; the entrance is at the high end, on the lee side.
Advantages
- Only one anchor point needed
- Few staking points
- Good protection from wind from one direction
Disadvantages
- Little space, only for one person
- Entrance side exposed if the wind shifts
- Little headroom
Deep knowledge
Background
One- and multi-point pitches with a square sheet are part of the basic repertoire of improvised shelters; military survival manuals describe comparable forms using a poncho or parachute cloth. Names vary by source and region – what matters is the principle: low side into the wind, panels taut.
The diamond is a good pitch when only one tree or pole is available. Like any tarp, it replaces neither ground insulation nor a safe site.
Variants
- Flying diamond
- The side corners are guyed out a little above the ground instead of staked to it. More room and ventilation but less protection from side wind – mainly used as a roof over a hammock.
- With a trekking pole
- A trekking pole under the high corner replaces the tree; the corner is additionally guyed forward with a line.
Common mistakes
- Point not turned into the wind
- High corner too high – rain blows in
- Tarp too small for body length along the diagonal
- Not considering where puddles will form under the sleeping area
Limits and risks
- No tarp size given – depends on body height and tarp shape
- Unsuitable for storms from changing directions
Material alternatives
Derived from material properties: a substitute must have all relevant properties. Observe the notes on the substitute.
- Tarp
- Plastic sheet / large bin bag (Tears easily; never pull over the head (suffocation risk).), Emergency blanket (Tears easily once punctured; short-term shelter only.), Document folder (waterproof) (Store securely – contains sensitive personal data.), Rain poncho (When used as a shelter, it no longer protects your body from rain.), Bivy bag (Never fully close off the face.), Tent (Do not cook or heat inside the tent (fire and carbon monoxide danger).), Heavy-duty bin bag (large) (Suffocation risk: never pull plastic bags over the head or face and keep them away from small children.), Group shelter bag (Airtight – ventilate regularly.)
- Paracord
- Rope (Never use unknown or damaged rope for life-safety purposes.)
- Tent stakes
- Sturdy sticks / poles (Do not cut live wood where prohibited.)
- Trekking poles
- Sturdy sticks / poles (Do not cut live wood where prohibited.), Tent pole repair sleeve (Temporary only – have broken sections replaced at home.)
- Sleeping pad
- Dry leaves, grass or conifer boughs (Collect only where allowed; no protected plants. Check for ticks and insects.), Backpack, Dry spare clothing (Carry it in waterproof packaging – wet clothing barely insulates.), Wool blanket / duvet (Keep away from candles, stoves and heaters.), Insulated cool box (Keeps cold only for a limited time; without ice packs or ice it is not a fridge.), Sleeping bag (Do not store compressed long-term; do not pack away damp.), Newspaper and cardboard (Flammable – keep away from candles, stoves, heaters and embers.), Insulated cooking box (hay box, thermal cooker) (Never put open flame or embers inside – only the hot, closed pot.)
Results come exclusively from structured entries. No improvised instructions are generated.
Sources
Headquarters, Department of the Army (USA) (2002): FM 3-05.70 Survival
Principles of improvised shelters, site selection and shelter construction
Wilderness & Environmental Medicine (Wilderness Medical Society) (2019): Wilderness Medical Society Clinical Practice Guidelines for the Out-of-Hospital Evaluation and Treatment of Accidental Hypothermia: 2019 Update
Wind, wet and ground contact as factors in hypothermia