Hand drill friction fire
In the hand drill, a thin, straight shaft is spun rapidly back and forth between flat palms while being pressed into a socket in a board. It is the simplest equipment but one of the hardest friction methods: it demands very suitable, dry materials, stamina and hardened hands.
- Very strenuous; success usually only after long practice
Explained simply
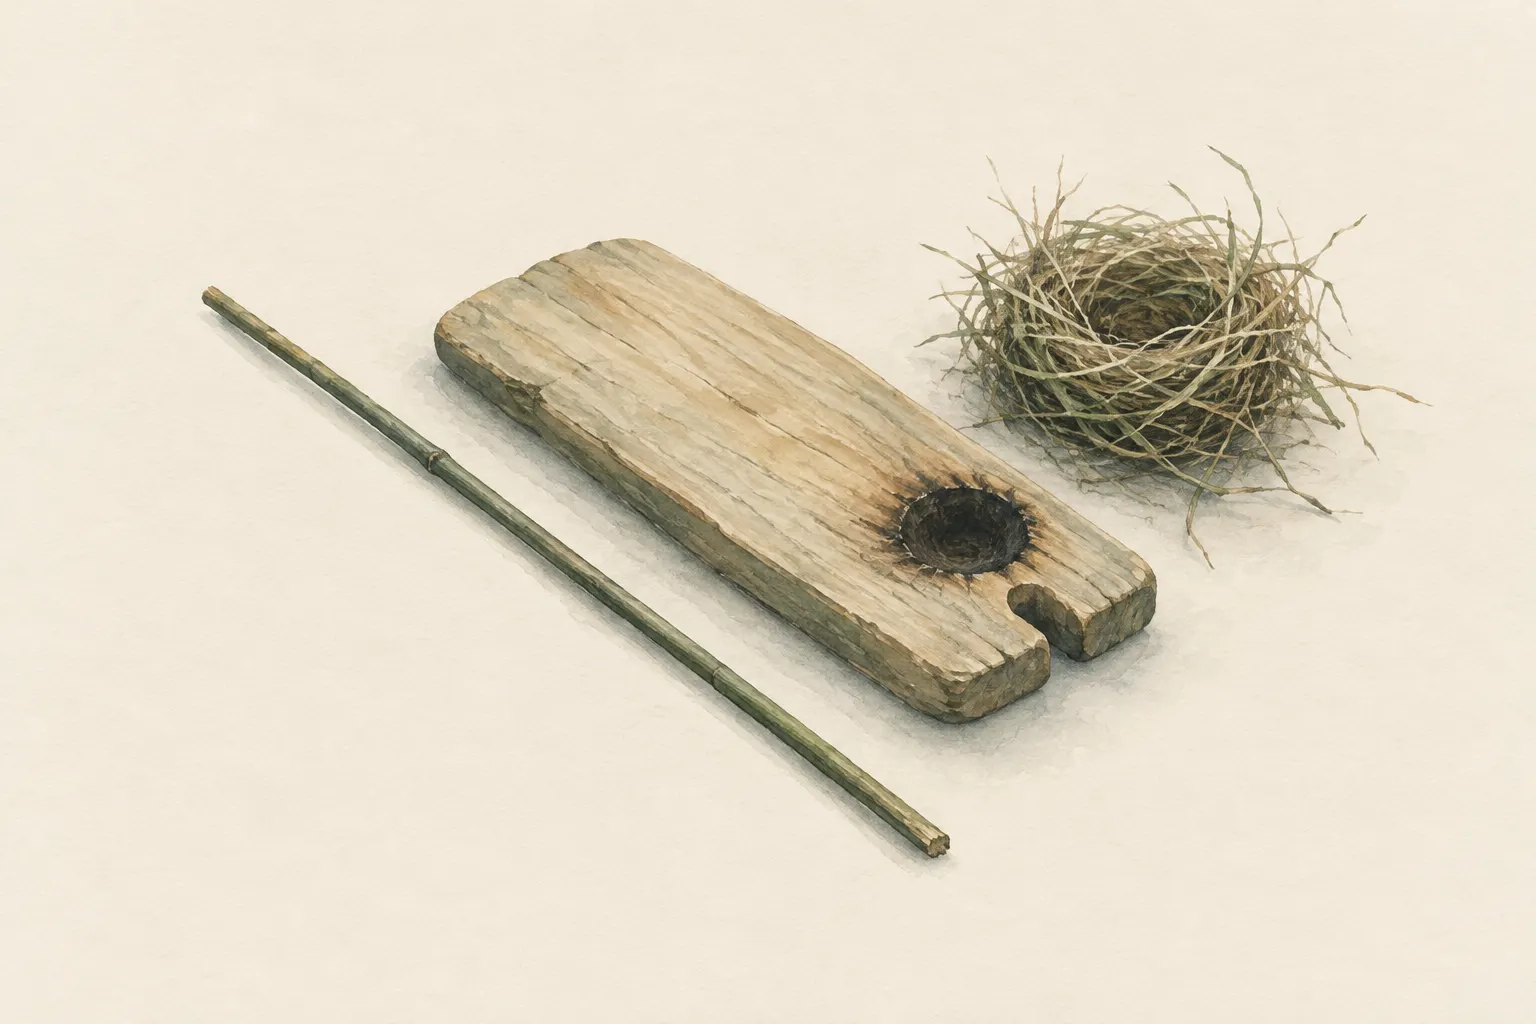
For the hand drill you need only two things: a long, thin, straight shaft and a soft wooden board. You stand the shaft upright in a small socket in the board and rub it quickly back and forth between your flat palms – just as you would rub your hands to warm them in winter, only with a stick in between. At the same time you press it down.
The friction produces hot wood dust that collects in a notch and at some point glows on its own. You put this ember into a nest of dry fibres and blow it into a flame.
The equipment is the simplest of all, but the method is one of the hardest. It needs very dry, well-suited material, a lot of stamina and hardened hands. You get blisters on your palms quickly – stop in time.
How it works
The principle is the same as with the bow drill: friction under pressure produces hot wood dust that collects in a notch, insulates itself there and keeps heating until it smoulders on its own. The difference: there is no bow and no bearing block. Spinning speed and pressure come from your hands alone.
That is why the materials must suit the job especially well. The shaft must be light, straight and dry so it can spin fast without wobbling. The board must be soft so that little force produces enough dust and heat. With a heavy, crooked shaft or a hard board it hardly ever works.
As you rub, your hands travel down the shaft. You must quickly reset at the top. Every pause lets the shaft and socket cool down, and the heat you worked hard to build is lost. That is what makes the hand drill so strenuous.
What really matters
Materials: a long, straight, very dry and light shaft, often made from dry stalks or shoots, and a soft, dry board. Which materials are suitable in your area requires local knowledge; ask experienced local people and experiment. Make the socket and notch as for the bow drill, with the ember base and tinder bundle ready.
Posture: kneeling, hold the board down with your foot and stand the shaft upright in the socket. Rub it back and forth between your outstretched, flat palms while pressing down. When your hands reach the bottom, reset at the top in a flash without the shaft jumping out of the socket.
Final push: when smoke rises and dark dust collects in the notch, make a few more fast, forceful passes. If the dust keeps smoking after you stop, it is an ember. Transfer it on its base into the tinder bundle as with the bow drill and blow it to flame.
When it makes sense – and when not
The hand drill is above all a skill for advanced learners and for dry climates. In damp surroundings, rain or high humidity it hardly ever works. With cold, stiff or injured hands it is practically impossible.
As an emergency method it is even less reliable than the bow drill. Friction fire is generally not a reliable emergency plan: it succeeds only with suitable, dry material and a lot of practice, and it costs a lot of energy. So always carry at least two modern ignition sources.
Safety: what to watch out for
Blisters and raw patches on the palms develop quickly. In the field they can become infected and then hinder you in everything else. Stop before the skin tears, and do not keep drilling with open blisters. Keep open patches clean and covered.
You need a knife for the socket and notch: always carve away from your body and sit securely; fatigue increases the risk. The ember is small and fragile – prepare the tinder bundle completely beforehand. And as with any fire: check the local rules and the wildfire danger beforehand.
Good to know
The hand drill is one of the oldest known fire techniques and was used in many cultures worldwide, especially in dry regions. There are variants that spare the hands: in one, a cord with thumb loops is attached at the top of the shaft, so the hands can stay at the top and apply pressure; this requires an adapted shaft tip. In groups, two people sometimes take turns on the shaft so it does not cool down.
For modern outdoor practice, the hand drill is mainly a training skill that teaches a lot about patience, materials and technique. Anyone who learns it understands every fire better afterwards – but in a real emergency still needs a lighter, matches or a ferro rod.
Step by step
Prepare materials
Choose a long, straight, dry shaft and a soft board. Make the socket and notch as for the bow drill; lay out an ember base and tinder bundle.
- 1
Prepare materials
Choose a long, straight, dry shaft and a soft board. Make the socket and notch as for the bow drill; lay out an ember base and tinder bundle.
- 2
Position
Kneeling, hold the board down with your foot. Stand the shaft upright in the socket.
- 3
Spin
Rub the shaft back and forth between flat, outstretched palms while pressing down. The hands travel downwards; quickly reset at the top without letting the shaft cool.
- 4
Final push and ember
With smoke and dark dust, make a few fast, forceful passes. If the dust keeps smoking after you stop, transfer the ember as with the bow drill.
Common mistakes
- A shaft that is too heavy or crooked
- A board that is too hard
- Pauses when resetting the hands
- Continuing with open blisters
Quick view
Materials
Sturdy sticks / poles
A straight, light, dry shaft and a dry, soft board
Do not cut live wood where prohibited.
Knife (fixed or locking blade)
Cut away from your body.
Rules on carrying knives differ by region – check local rules.
Tinder
Carry in waterproof packaging.
Do not use liquid accelerants as tinder.
Suitable for
- Dry climates
- Advanced skill training
Not suitable for
- Humid climates and rain
- Emergencies without long practice
- Cold, stiff or injured hands
Prerequisites
- Very dry, light stalks or shoots
- Soft, dry board wood
- Hardened hands and practice
Safety
- The ember is small and fragile. Have the tinder bundle completely ready beforehand and transfer the ember calmly but promptly.
- Friction fire is not a reliable emergency plan. It succeeds only with suitable, dry wood and a lot of practice, and it costs a lot of energy. Always carry at least two modern ignition sources.
- Blisters and raw patches on the palms develop quickly and can become infected in the field. Stop in time.
- When carving and notching, always work away from your body and sit securely. Fatigue increases the risk of injury.
How it works
As with the bow drill, friction produces hot wood dust that collects in a notch. Without a bow, speed and pressure come from the hands alone; the shaft must therefore be light and straight and the board soft, so that little force produces enough heat.
Advantages
- Very light, simple equipment
- No bow or cord needed
Disadvantages
- One of the hardest methods
- Very hard on the hands
- Successful only with few, very suitable materials
Deep knowledge
Background
The hand drill is one of the oldest known fire techniques and was used in many cultures worldwide, especially in dry regions.
For modern outdoor practice it is mainly a training skill. As an emergency method it is even less reliable than the bow drill.
Variants
- With thumb loops
- A cord attached at the top with loops for the thumbs lets you keep your hands at the top and apply pressure. This requires an adapted shaft tip.
Common mistakes
- A shaft that is too heavy or crooked
- A board that is too hard
- Pauses when resetting the hands
- Continuing with open blisters
Limits and risks
- Hardly successful in damp surroundings
- Requires local knowledge of suitable materials
Material alternatives
Derived from material properties: a substitute must have all relevant properties. Observe the notes on the substitute.
- Tinder
- Dry firewood (Collect only where permitted.), Char cloth (charred cotton) (Store dry in a tin.), Finest-grade steel wool (Store separately from batteries – fire risk.), Fatwood (resin-rich wood) (Collect only dead wood where permitted.), Stove fuel (canister, liquid fuel, alcohol) (Store fuels apart from food and in original containers or bottles intended for them.), Petroleum jelly cotton balls (Use only pure cotton.)
Results come exclusively from structured entries. No improvised instructions are generated.
Sources
Ray Mears – Hodder & Stoughton (2002): Bushcraft
Friction fire, including the hand drill
Headquarters, Department of the Army (USA) (2002): FM 3-05.70 Survival
General principles of fire by friction