Planned bivouac in a bivy bag
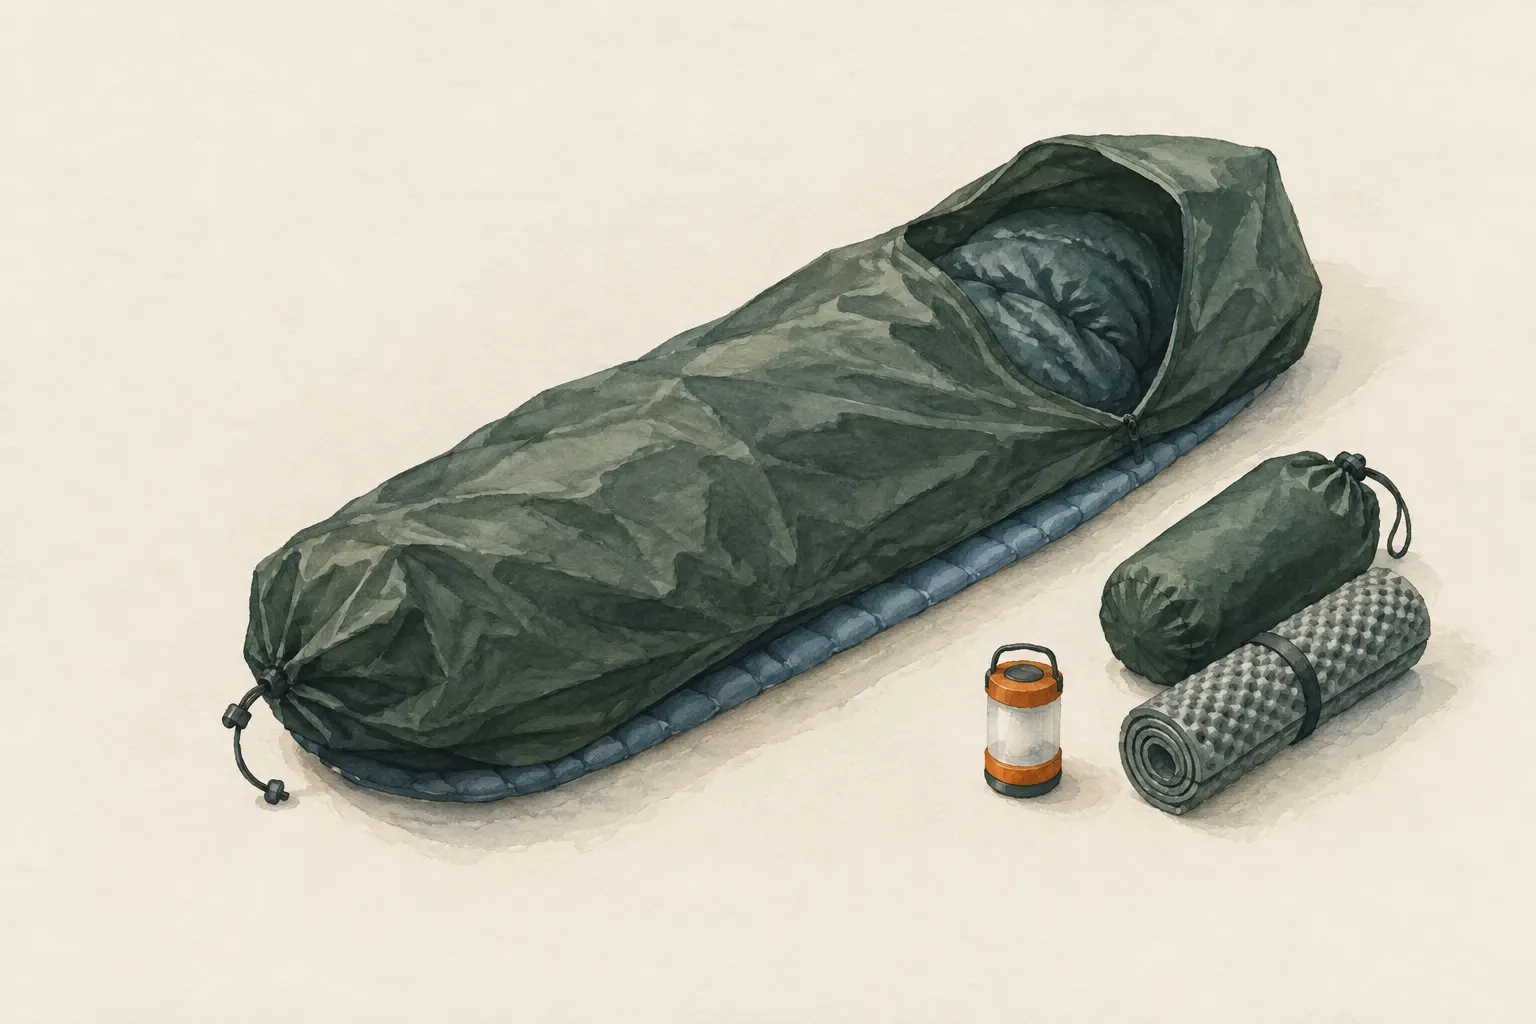
A bivy bag is a waterproof or water-resistant cover for a sleeping bag and pad. For a planned night it is the lightest shelter, but it only protects the body, not gear or room to move. Breathable models reduce condensation but do not eliminate it.
- A few minutes
Explained simply
A bivy bag is like a waterproof cover for your sleeping bag – a kind of rain jacket that you crawl into together with your sleeping bag and pad. It keeps off wind, rain and dew. Then you do not need a tent.
It is very light and small, but also tight: it only protects your body. There is no room inside for gear, changing clothes or cooking. Also, some moisture from your breath and body forms inside, which you have to air out in the morning.
Most important: your face must always get fresh air. Never pull a bivy bag right over your head unless it is designed for that, and never put a plastic bag over your head.
How it works
The bivy bag keeps wind, rain and spray off the sleeping bag. It raises the sleeping bag's warmth somewhat because it stops wind blowing through the filling and carrying the warm air away. This loss of warmth through moving air is called convection.
At the same time your body gives off moisture all night, mainly as water vapour. That vapour has to escape outwards through the material. If it cannot, it settles as water on the cool inner surface – that is condensation. Breathable materials reduce this problem but do not remove it entirely. In cold and humid conditions it often gets damp inside.
The sleeping pad goes either inside the bivy bag or underneath it. If it is inside, it cannot slide away during the night, and you do not suddenly end up lying on the cold ground.
Safety: what to watch out for
Your face and breathing opening must never be fully closed off. Only pull a bivy bag over your head if it is expressly designed for that and has ventilation. Plastic bags or sheets never go over your head – there is a risk of suffocation.
The moisture inside can gradually dampen down sleeping bags. Down keeps you much less warm when wet. So air things out in the morning and dry the sleeping bag on multi-day trips whenever sun or wind allow.
A bivy bag does not protect against water coming from below. Do not lie in gullies, hollows or dry streambeds where water can collect or flow in rain. And as always: not under dead branches or in places with rockfall.
What really matters
The spot decides a lot: level, slightly raised, out of the wind, without rockfall or falling-branch risk and not in a hollow. A bush, a boulder or a terrain edge as a windbreak makes a big difference.
Organisation matters because there is no room for gear. Stow shoes and gear dry in a stuff sack or your backpack, and keep the headlamp within reach next to your head. A stuff sack with dry clothes can serve as a pillow.
Adjust the head opening so that rain stays out but fresh air reaches your face. Many bivy bags have a drawcord or a small hood for this – what matters is that your breath can get outside.
When it makes sense – and when not
For a planned night, the bivy bag is the lightest shelter. It comes from mountaineering, where weight and space are scarce, and is ideal for a night under a clear sky, on narrow spots where no tent fits, or as a backup.
For several days of rain, long waits awake in bad weather and for people who feel uncomfortable in tight spaces it is unsuitable – then a tent or a tarp above it is better. Unlike the emergency bivouac with an emergency blanket, the bivy bag is designed for a whole night with a sleeping bag, not just a short emergency.
How to practise it
Before a longer trip, spend a trial night close to home – in the garden or at a permitted spot. That way you learn how warm your system of bivy bag, sleeping bag and pad is and how much condensation forms.
Also practise getting in and out and stowing your gear in the dark. What is awkward in the garden becomes even harder in rain and cold. Note what was missing and adjust your packing list.
Step by step
Choose a spot
A level, slightly raised spot out of the wind, without rockfall or falling-branch risk, not in hollows.
- 1
Choose a spot
A level, slightly raised spot out of the wind, without rockfall or falling-branch risk, not in hollows.
- 2
Insert the pad
Put the sleeping pad inside the bivy bag or underneath, then the sleeping bag.
- 3
Secure gear
Stow shoes and gear dry in a stuff sack or backpack, lamp within reach.
- 4
Adjust the opening
Adjust the head opening so that rain is kept off but fresh air reaches your face.
- 5
Air out in the morning
Air out the bivy bag and sleeping bag and dry them when possible.
Common mistakes
- Face fully enclosed
- Lying in a hollow
- Sleeping pad slips out
- Not drying the sleeping bag over several days
Quick view
Materials
Bivy bag
Never fully close off the face.
Condensation forms inside.
Sleeping pad
Sleeping bag
Do not store compressed long-term; do not pack away damp.
Tarp
A small tarp over the head area for rain
Dry bag
For gear
Suitable for
- Lightweight trips, summit bivouacs, spots without room for a tent
- A reserve on longer trips
Not suitable for
- Several days of rain
- People who suffer in tight spaces
- Long waits awake in bad weather
Prerequisites
- A forecast without prolonged heavy rain
- Experience with your own sleep system
Safety
- Moisture forms inside and can dampen down sleeping bags. Air it out in the morning and dry the sleeping bag on multi-day trips.
- Do not choose a spot in gullies or hollows; a bivy bag does not protect against water flowing from below.
How it works
The bivy bag keeps wind, rain and spray off the sleeping bag and raises its warmth somewhat by stopping convection. Body moisture must escape through the material; if it cannot, it condenses inside. The sleeping pad goes in or under the bag so that it does not slide away.
Advantages
- Very light and compact
- Hardly any setup time
- Needs little space
Disadvantages
- No room for gear or sitting
- Condensation
- Unpleasant in long rain
Deep knowledge
Background
Bivy bags come from mountaineering, where weight and space are scarce; literature such as "Mountaineering: The Freedom of the Hills" treats them as part of a bivouac. Unlike the emergency bivouac with an emergency blanket, the planned bivy bag is designed for a whole night with a sleeping bag.
Before a longer trip, a trial night close to home is worthwhile to get to know the condensation and warmth of your own system.
Variants
- With a small tarp
- A small tarp over the head end lets you leave the opening wider in rain and protects gear.
Common mistakes
- Face fully enclosed
- Lying in a hollow
- Sleeping pad slips out
- Not drying the sleeping bag over several days
Limits and risks
- No statements about the breathability of specific materials
- Not a substitute for a tent in prolonged rain
Material alternatives
Derived from material properties: a substitute must have all relevant properties. Observe the notes on the substitute.
- Bivy bag
- Tarp, Plastic sheet / large bin bag (Tears easily; never pull over the head (suffocation risk).), Emergency blanket (Tears easily once punctured; short-term shelter only.), Document folder (waterproof) (Store securely – contains sensitive personal data.), Rain poncho (When used as a shelter, it no longer protects your body from rain.), Tent (Do not cook or heat inside the tent (fire and carbon monoxide danger).), Heavy-duty bin bag (large) (Suffocation risk: never pull plastic bags over the head or face and keep them away from small children.), Group shelter bag (Airtight – ventilate regularly.)
- Sleeping pad
- Dry leaves, grass or conifer boughs (Collect only where allowed; no protected plants. Check for ticks and insects.), Backpack, Dry spare clothing (Carry it in waterproof packaging – wet clothing barely insulates.), Wool blanket / duvet (Keep away from candles, stoves and heaters.), Insulated cool box (Keeps cold only for a limited time; without ice packs or ice it is not a fridge.), Sleeping bag (Do not store compressed long-term; do not pack away damp.), Newspaper and cardboard (Flammable – keep away from candles, stoves, heaters and embers.), Insulated cooking box (hay box, thermal cooker) (Never put open flame or embers inside – only the hot, closed pot.)
- Sleeping bag
- Sleeping pad, Dry leaves, grass or conifer boughs (Collect only where allowed; no protected plants. Check for ticks and insects.), Backpack, Dry spare clothing (Carry it in waterproof packaging – wet clothing barely insulates.), Wool blanket / duvet (Keep away from candles, stoves and heaters.), Insulated cool box (Keeps cold only for a limited time; without ice packs or ice it is not a fridge.), Newspaper and cardboard (Flammable – keep away from candles, stoves, heaters and embers.), Insulated cooking box (hay box, thermal cooker) (Never put open flame or embers inside – only the hot, closed pot.)
- Tarp
- Plastic sheet / large bin bag (Tears easily; never pull over the head (suffocation risk).), Emergency blanket (Tears easily once punctured; short-term shelter only.), Document folder (waterproof) (Store securely – contains sensitive personal data.), Rain poncho (When used as a shelter, it no longer protects your body from rain.), Bivy bag (Never fully close off the face.), Tent (Do not cook or heat inside the tent (fire and carbon monoxide danger).), Heavy-duty bin bag (large) (Suffocation risk: never pull plastic bags over the head or face and keep them away from small children.), Group shelter bag (Airtight – ventilate regularly.)
Results come exclusively from structured entries. No improvised instructions are generated.
Sources
The Mountaineers Books (2017): Mountaineering: The Freedom of the Hills, 9th edition
Bivouac and bivy sack in mountaineering
Wilderness & Environmental Medicine (Wilderness Medical Society) (2019): Wilderness Medical Society Clinical Practice Guidelines for the Out-of-Hospital Evaluation and Treatment of Accidental Hypothermia: 2019 Update
Wind, wet and ground contact as factors in hypothermia