Covered snow trench
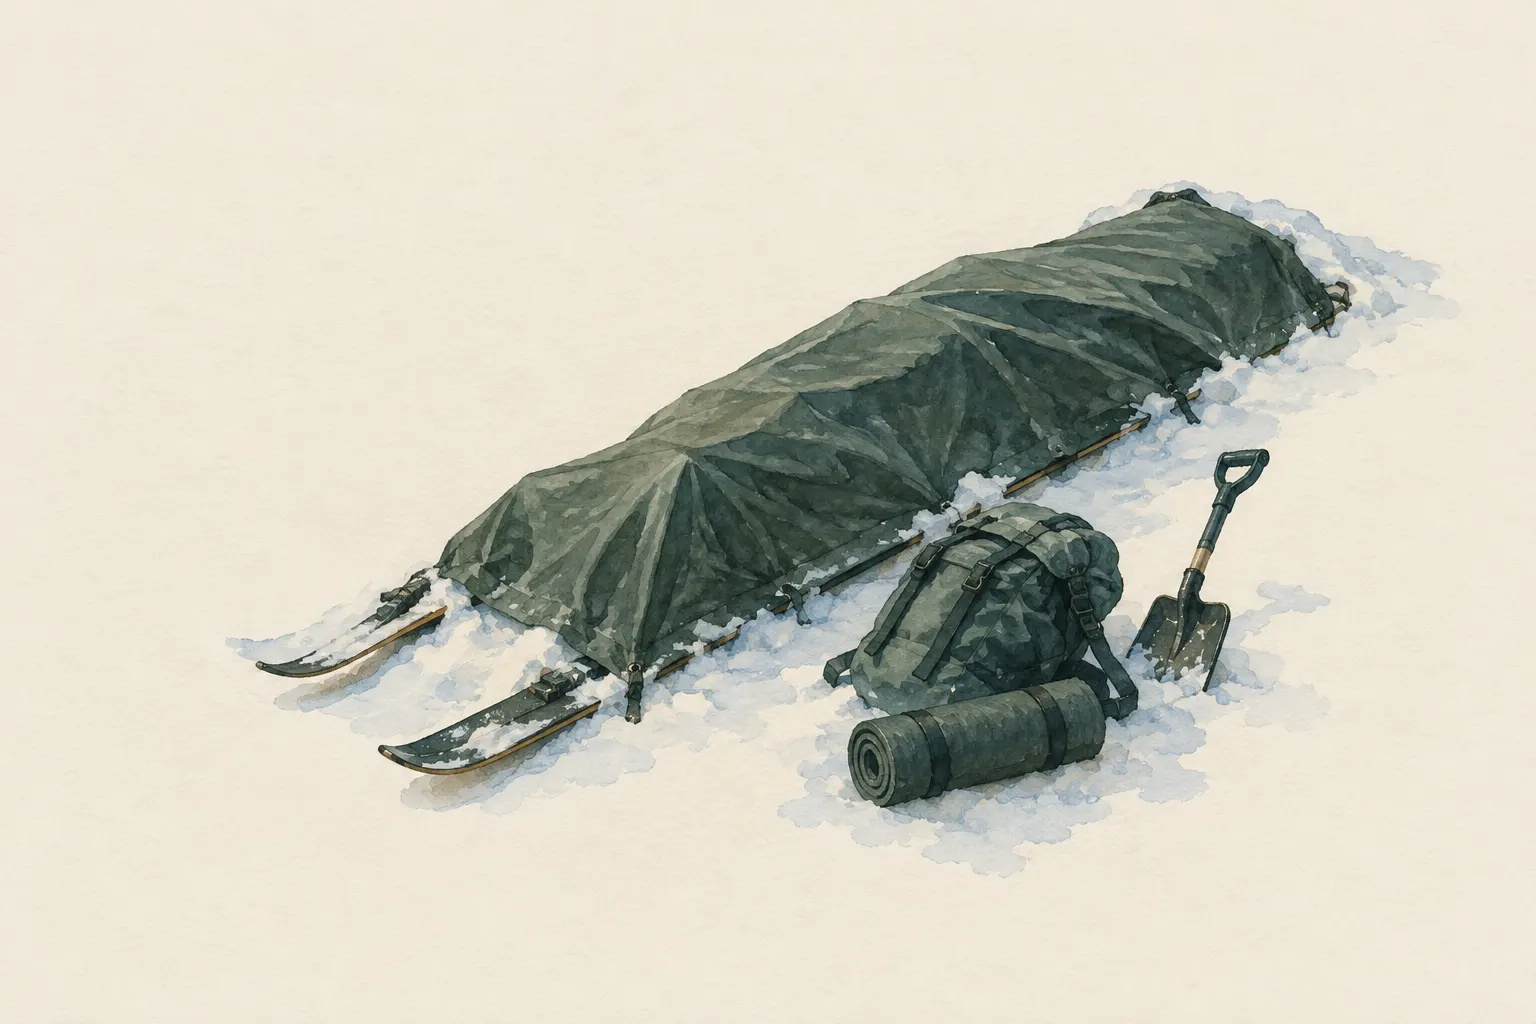
A body-length, narrow trench in the snow, covered with a tarp, sheet, skis with a sheet or snow blocks. Of the snow shelters it is usually the quickest and least prone to collapse, and so often preferable to a cave in emergencies – but only in flat terrain without avalanche danger.
- With a shovel usually up to about an hour; depends on snow and practice
Explained simply
Snow is surprising: it is cold, but it keeps out wind and lets warmth escape only slowly – a bit like a thick blanket full of tiny air pockets. If you dig a narrow trench as long as you are and put a roof over it, you lie below the snow surface, sheltered from the icy wind.
The roof can be a tarp resting on skis or poles, or snow blocks leaned against each other like a pointed roof. Of all snow shelters, the trench is usually the quickest to build and the least likely to collapse.
Most important: build only in flat terrain, never on or below slopes – avalanches can come down there. Never use a stove or candle in the trench, and always keep an air hole open.
How it works
Fresh snow consists largely of trapped air. That air hardly moves and conducts heat poorly. That is why snow walls insulate even though snow itself is cold. Below the surface you are also out of the wind, and wind is one of the strongest robbers of warmth.
A narrow trench is quick to dig and easy to cover. The narrower it is, the shorter the span the roof has to bridge – and the less it sags. Cold air is heavier than warm air and sinks. Where possible, the entrance is therefore lower than the sleeping surface or at the foot end, so that the coldest air collects there and not around you.
You still need insulation underneath. Snow draws warmth from the body on direct contact and melts in the process, so you get wet. A sleeping pad or your backpack as a base is therefore indispensable.
Safety: what to watch out for
Avalanche terrain is excluded from this entry. Never build on or below slopes, under cornices (overhanging snow edges) or in gullies. Anyone travelling in steep snowy terrain needs avalanche training and the current avalanche forecast. Also keep away from ski runs, trails and vehicle tracks.
Stoves, candles and burners in a snow shelter can produce lethal amounts of carbon monoxide and use up oxygen. Carbon monoxide is invisible and odourless. An open ventilation hole is mandatory, and stoves are run outdoors as a rule.
Digging in snow makes you wet and sweaty. Soaked clothing can trigger hypothermia. Take off insulating layers first and stow them dry, keep the waterproof outer layer on and work slowly. Fresh snow and drifting load a sheet roof: knock it off regularly at night and keep the air hole clear. Mark the trench clearly so that nobody steps or drives onto it and rescuers can find you. At signs of hypothermia, call the local emergency number (112 in the EU).
What really matters
Before digging comes the question of whether there is a better alternative: turning back, reaching a hut, staying in a vehicle or an emergency bivouac in the lee. A snow trench makes sense when you have a shovel, time and dry clothing. Without a shovel it is hardly feasible.
Keep the trench narrow. A trench that is too wide is hard to cover, and a sheet without supports sags under snow load and can press down on you. Lay sticks, skis or trekking poles across as supports and weigh down the edges of the sheet with snow. Alternatively, in firm snow, blocks can be cut and leaned against each other in a gable.
Take the shovel inside with you. If the roof caves in or the entrance drifts shut, you need it to dig yourself out. Never seal the entrance completely.
When it makes sense – and when not
The snow trench is considered a good compromise between effort and protection when a bivouac in snow is unavoidable. It is usually quicker to build and less prone to collapse than a snow cave or quinzhee, and so is often the better choice in emergencies.
It is unsuitable in avalanche terrain, on slopes and in gullies, in wet snow and thaw conditions, when the walls soften and water gets in, and without a shovel. There are no fixed figures for depth or wall thickness – they depend heavily on the snow.
How to practise it
Practise in safe, flat terrain close to the car or a hut, in calm weather and with company. That way you can stop at any time. Find out how long it takes you with your shovel, how much you sweat and how best to secure the sheet.
Good preparation is decisive: an avalanche shovel, waterproof clothing, a sleeping pad and knowing when turning back is the wiser choice. Courses run by mountaineering or outdoor organisations teach snow shelters and avalanche awareness together.
Step by step
Weigh up
Check alternatives such as turning back, a hut, a vehicle or an emergency bivouac in the lee. Dig only with a shovel, time and dry clothing.
- 1
Weigh up
Check alternatives such as turning back, a hut, a vehicle or an emergency bivouac in the lee. Dig only with a shovel, time and dry clothing.
- 2
Choose a safe spot
Flat terrain with no slopes, cornices or gullies above; away from ski runs, trails and vehicle tracks.
- 3
Shed layers
Stow insulating clothing dry, keep the waterproof outer layer on, work slowly.
- 4
Dig the trench
Dig a narrow trench, a little longer than your body. Keep it narrow – the wider it is, the harder it is to cover.
- 5
Cover
Lay a sheet over the trench and weigh down the edges with snow, using poles or skis as supports; alternatively lean snow blocks against each other in a gable.
- 6
Vent and entrance
Keep a ventilation opening clear and do not seal the entrance completely.
No stove or candle in the trench.
- 7
Insulate and mark
Lie on a sleeping pad or backpack, take the shovel inside, mark the location outside.
Common mistakes
- Trench too wide
- Sheet without supports – it sags under snow load
- Forgetting ventilation
- Leaving the shovel outside
- Building on a slope
Quick view
Materials
Snow shovel
Practically indispensable
Always take it inside when digging a snow shelter.
Tarp
Or a sheet, emergency blanket or snow blocks as the roof
Sleeping pad
Insulation against the snow floor
Trekking poles
Or skis as roof supports
Dry spare clothing
Carry it in waterproof packaging – wet clothing barely insulates.
Suitable for
- An unexpected winter night outdoors with a shovel
- Protection from wind in open, flat terrain
Not suitable for
- Avalanche terrain, slopes, gullies
- Wet snow and thaw conditions
- Without a shovel
Prerequisites
- Sufficiently deep or firm snow
- Flat terrain with no slopes above
- A shovel and waterproof clothing
Safety
- Fresh snow and drifting load a sheet roof. Knock it off regularly at night and keep the vent clear.
- Mark the trench and its surroundings clearly so that nobody steps or drives onto it and rescuers can find it.
How it works
Below the snow surface you are out of the wind, and the snow walls insulate. A narrow trench is quick to dig and can be closed with a sheet or snow blocks. Cold air sinks: where possible the entrance is lower than the sleeping surface or at the foot end.
Advantages
- Quicker than a cave or quinzhee
- Less serious consequences of collapse with a sheet roof
- Works even with moderate snow depth
Disadvantages
- A sheet roof is colder than snow
- Risk of getting soaked while digging
- Snow load on the sheet
Deep knowledge
Background
The snow trench is described in FM 3-05.70 and in mountaineering literature as a simple snow shelter. It is considered a good compromise between effort and protection when a bivouac in snow is unavoidable.
As with all snow shelters, preparation is decisive: a shovel, waterproof clothing, a sleeping pad and knowing when it is better to turn back.
Variants
- Roof of snow blocks
- With well-settled snow, blocks can be cut and set in a gable over the trench. Warmer than a sheet but requires suitable snow and practice.
Common mistakes
- Trench too wide
- Sheet without supports – it sags under snow load
- Forgetting ventilation
- Leaving the shovel outside
- Building on a slope
Limits and risks
- No figures for depth or wall thickness
- No statements about avalanche danger
Material alternatives
Derived from material properties: a substitute must have all relevant properties. Observe the notes on the substitute.
- Tarp
- Plastic sheet / large bin bag (Tears easily; never pull over the head (suffocation risk).), Emergency blanket (Tears easily once punctured; short-term shelter only.), Document folder (waterproof) (Store securely – contains sensitive personal data.), Rain poncho (When used as a shelter, it no longer protects your body from rain.), Bivy bag (Never fully close off the face.), Tent (Do not cook or heat inside the tent (fire and carbon monoxide danger).), Heavy-duty bin bag (large) (Suffocation risk: never pull plastic bags over the head or face and keep them away from small children.), Group shelter bag (Airtight – ventilate regularly.)
- Sleeping pad
- Dry leaves, grass or conifer boughs (Collect only where allowed; no protected plants. Check for ticks and insects.), Backpack, Dry spare clothing (Carry it in waterproof packaging – wet clothing barely insulates.), Wool blanket / duvet (Keep away from candles, stoves and heaters.), Insulated cool box (Keeps cold only for a limited time; without ice packs or ice it is not a fridge.), Sleeping bag (Do not store compressed long-term; do not pack away damp.), Newspaper and cardboard (Flammable – keep away from candles, stoves, heaters and embers.), Insulated cooking box (hay box, thermal cooker) (Never put open flame or embers inside – only the hot, closed pot.)
- Trekking poles
- Sturdy sticks / poles (Do not cut live wood where prohibited.), Tent pole repair sleeve (Temporary only – have broken sections replaced at home.)
- Dry spare clothing
- Sleeping pad, Dry leaves, grass or conifer boughs (Collect only where allowed; no protected plants. Check for ticks and insects.), Backpack, Wool blanket / duvet (Keep away from candles, stoves and heaters.), Insulated cool box (Keeps cold only for a limited time; without ice packs or ice it is not a fridge.), Sleeping bag (Do not store compressed long-term; do not pack away damp.), Newspaper and cardboard (Flammable – keep away from candles, stoves, heaters and embers.), Insulated cooking box (hay box, thermal cooker) (Never put open flame or embers inside – only the hot, closed pot.)
Results come exclusively from structured entries. No improvised instructions are generated.
Sources
Headquarters, Department of the Army (USA) (2002): FM 3-05.70 Survival
Snow trench as a cold-weather shelter
The Mountaineers Books (2017): Mountaineering: The Freedom of the Hills, 9th edition
Snow shelters in mountaineering
World Health Organization, Regional Office for Europe (2010): WHO guidelines for indoor air quality: selected pollutants (carbon monoxide chapter)
Carbon monoxide in enclosed spaces
Wilderness & Environmental Medicine (Wilderness Medical Society) (2019): Wilderness Medical Society Clinical Practice Guidelines for the Out-of-Hospital Evaluation and Treatment of Accidental Hypothermia: 2019 Update
Wind, wet and ground contact as factors in hypothermia