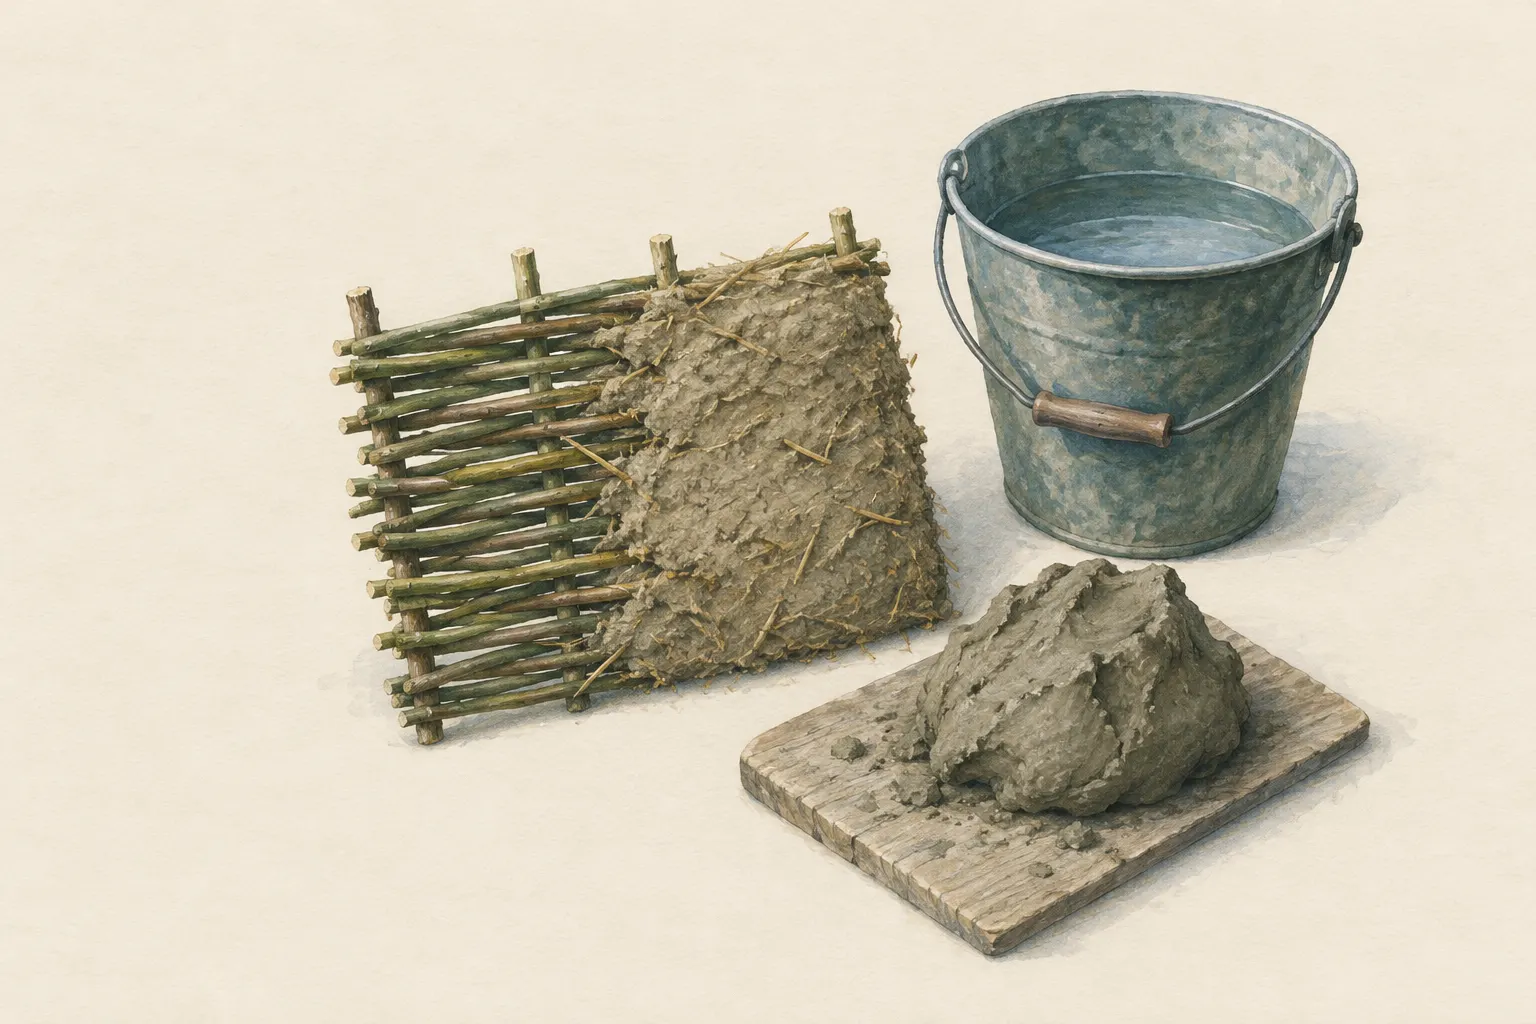
Wattle wall with clay daub
Flexible rods are woven between posts like a basket, then a mixture of clay, straw and water is pressed onto it from both sides. Once dry it forms a firm, windproof wall. The art lies in the right clay – you check it with simple tests – and in protecting it from rain: a large roof overhang above, a stone plinth below.
- Several days per wall plus drying time
Explained simply
Have you ever seen a basket made of willow rods? A wattle wall is something like a giant, flat basket between two posts. You set thin poles upright side by side and weave flexible rods alternately in front of and behind them.
Then comes the muddy part: clay from the ground is mixed with water and chopped straw, best with your feet, like kneading dough. You press this mush into the weave from both sides. When it dries it becomes hard, and the wall keeps out wind and cold. The straw works like lots of little threads that hold the clay together.
But clay has a weakness: when it gets wet it becomes soft again. So a clay wall needs a roof above that sticks out far, and stones below so no rain water splashes up from the ground. Before you dig clay and cut rods, you ask the owner.
How it works
A wattle wall has two parts with clear tasks. The wooden weave gives shape and support, the clay makes the wall tight and heavy. Clay minerals – the finest part of the soil – act like a natural glue: wet they are mouldable, and as they dry the tiny particles bond firmly together. But they shrink while doing so, and without additives large cracks would form.
Straw, hay or dry grass in the mix prevents this. The fibres run through the clay, hold it together as it shrinks and spread the stress over many fine hairline cracks instead of a few wide gaps. Sand makes the clay leaner and reduces shrinkage further. Because the clay is pressed through the gaps in the weave from both sides, the two layers join in the middle and enclose the wood.
A finished clay wall stores heat and releases it slowly. It also evens out moisture in the air. On its own, however, it insulates only moderately; for cold winters an extra layer helps, such as a light clay-straw mix or a packing of leaves on the outside under the roof overhang.
What really matters
The right clay almost always lies beneath the dark, humus-rich top layer. Topsoil contains plant remains that rot, and it holds poorly. The rolling test quickly shows whether there is enough clay in the soil: roll a moist sample into a pencil-thick sausage and bend it carefully. If it breaks at once the soil is too sandy. In the shake jar you see the proportions: sand at the bottom, silt above, and at the very top the fine clay, which takes hours to settle.
The test patch is the most important test. Spread a palm-sized piece on the weave or a board and let it dry completely. Wide, deep cracks mean too much clay – then add more sand and straw. If the sample crumbles or rubs off with a finger, there is too little clay. Only when the sample is hard and has only fine cracks is it worth daubing the whole wall.
The rods must be fresh so they bend without breaking; long-dried rods are soaked in water first. Each row is pressed down firmly. When daubing you dampen the weave so the clay sticks better, and work from the bottom up. Drying is slow: strong sun and wind make the surface shrink too fast, frost bursts wet clay.
Safety: what to watch out for
The work itself is not very dangerous, but the pits are. Clay pits quickly become deep, their walls can slump, and anyone who falls in in the dark can be badly hurt. Dig shallow with sloping sides, never under an overhanging edge, and refill or mark pits after work – especially if there are children in the camp.
Cutting rods and sharpening posts and staves leads to cuts. Always cut away from the body, keep your other hand out of the cutting path and wear gloves. Lime, sometimes used as a wash or render, is caustic: work with it only with tight-fitting goggles and gloves, and if lime gets in an eye rinse with water at once for a long time and get help.
When it makes sense – and when not
Wattle with clay suits a long-term camp in an area with clay soil and willow or hazel shrubs, when you have several dry, frost-free days and a roof is already up. The wall can also be built in small sections and repaired at any time. A weave without clay, backed with leaves, is a usable windbreak after only a few hours.
For a quick emergency shelter the clay wall is no good because it needs days to dry. In rainy periods without a roof, in frost and on sandy soils without clay it is the wrong choice. Then a tarp, a thick layer of leaves or a wall of fallen logs is better.
Good to know
Wattle walls with clay daub are known from excavations of Neolithic settlements all over Europe. In timber-framed houses an infill of staves, wattle and clay was common into the 19th century, and many of them still stand today. The architect and earth building researcher Gernot Minke summarised simple field tests for clay in his handbook; the Lehmbau Regeln describe today's state of the art.
An old saying among earth builders is that a clay wall needs 'good boots and a good hat': a stone plinth that separates it from the wet ground, and a roof that overhangs well. If a wall has both, it can last for generations. Without this protection the rain washes it out bit by bit.
Step by step
Set the posts
Set strong posts in firmly tamped holes or better on a plinth of stones so the wood does not stand in wet ground. At the top a wall plate (cross beam) joins them and carries the roof. The roof comes first, then the wall.
- 1
Set the posts
Set strong posts in firmly tamped holes or better on a plinth of stones so the wood does not stand in wet ground. At the top a wall plate (cross beam) joins them and carries the roof. The roof comes first, then the wall.
- 2
Fit upright staves
Between the posts fit thinner upright poles (staves) about a hand span to 30 centimetres apart. At the bottom they sit in the sill or the ground, at the top in the wall plate.
- 3
Weave the rods
Weave fresh rods horizontally, alternating in front of and behind the staves. The next rod runs exactly the other way. Press each row down firmly so the weave becomes dense and stiff. Small gaps are welcome – that is where the clay will grip later.
- 4
Find and test clay
Dig below the dark topsoil. Roll a moist sample into a pencil-thick sausage and bend it into a ring: if it breaks at once there is hardly any clay; if it bends, the clay is usable. Shaken in a jar of water, sand settles at the bottom and clay on top.
- 5
Mix
Soak the clay with water on a tarp, pick out stones, then tread it with your feet and work in chopped straw or grass until you have a mouldable mass that no longer sticks to your hands.
- 6
Make a test patch
Apply a small sample and let it dry. Large, wide cracks: too much clay – add more sand and straw. If the sample crumbles: too little clay – add richer clay. Only when the sample is firm with fine cracks only do you daub the whole wall.
- 7
Daub and press
Dampen the weave. Throw or press hand-sized balls of clay firmly into the weave, ideally two people at the same time from inside and outside, so the clay joins in the middle. Layer by layer until the wood is covered; smooth the surface.
- 8
Dry and protect
Let the wall dry slowly – protected from rain, strong sun and frost. Fill shrinkage cracks after a few days with a thinner mix. The roof must overhang well and the plinth must keep off splash water; check the wall after every storm.
Common mistakes
- Using topsoil instead of clay
- Daubing the whole wall without a test patch
- Using dry rods that snap when woven
- Exposing the wall to rain without a roof overhang
- Building in frost
- Setting posts unprotected in wet ground
Quick view
Materials
Sturdy sticks / poles
Strong posts, about arm-thick
Do not cut live wood where prohibited.
Flexible rods (e.g. willow, hazel)
Freshly cut, with permission
Cut only with permission; many riverside shrubs are protected.
Use fresh – dry rods snap when woven.
Clay-rich soil (subsoil)
Use only subsoil without roots and topsoil.
Secure or refill pits after digging – risk of falls.
Straw, hay or dry grass (chopped)
Highly flammable – store away from fire.
Small shovel / folding spade
Tarp
As a mixing base and rain cover
Sturdy work gloves
When handling flood mud or chemicals, also wear waterproof gloves.
Suitable for
- Walls for a hut in a long-term camp
- Areas with clay soil and willow or hazel
- Windbreak and heat store beside a fire site
Not suitable for
- Acute emergencies – drying takes days
- Constant rain without a roof
- Frost periods – wet clay freezes and crumbles
- Sandy or humus-rich soils without clay
Prerequisites
- Permission to dig clay, cut rods and build
- A roof or roof frame over the future wall
- A few days without frost
Safety
- Clay pits are trip hazards and can cave in. Do not dig under overhanging edges, keep pits shallow with sloping sides and refill them or mark them clearly afterwards – especially when children are around.
- Cutting rods and sharpening posts easily leads to cuts. Always cut away from the body, wear gloves and put knives down safely.
- Lime, sometimes used as a wash or render, is caustic and can seriously injure eyes and skin. Work with it only with tight-fitting goggles and gloves; if lime gets in an eye, rinse with water at once for a long time and get medical help.
- Clay softens again when wet. A clay wall without a roof overhang and without a plinth is gradually washed out by rain.
How it works
The wattle is the skeleton, the clay the flesh. Clay in the soil binds firmly as it dries but shrinks while doing so. Straw or grass in the mix acts like reinforcement: it holds the clay together and spreads shrinkage cracks into many small ones instead of a few large ones. Because the clay joins through the gaps in the weave from both sides, it grips the wood firmly.
Advantages
- Material often right on site
- Windproof and stores heat
- No nails, simple tools
- Can be repaired at any time
Disadvantages
- Long drying time
- Sensitive to rain and frost
- Only moderate insulation on its own
- Heavy, dirty work
Deep knowledge
Background
Wattle with clay is documented since the Neolithic and was the usual infill of timber-framed houses in Central Europe into modern times. In his earth building handbook Gernot Minke describes simple field tests such as the rolling test and the shake test; the Lehmbau Regeln of the German earth building association summarise today's state of the art.
An old saying among earth builders is that a clay wall needs 'good boots and a good hat' – a plinth and an overhanging roof.
Variants
- Light clay
- Lots of straw mixed with a little runny clay gives a lighter, better insulating infill; it needs formwork though and dries very slowly.
- Simple windbreak
- A wattle without clay, woven between posts and backed with leaves, breaks the wind after only a few hours of work.
Common mistakes
- Using topsoil instead of clay
- Daubing the whole wall without a test patch
- Using dry rods that snap when woven
- Exposing the wall to rain without a roof overhang
- Building in frost
- Setting posts unprotected in wet ground
Limits and risks
- No load-bearing walls – the posts carry the roof
- No recipes with exact mixing ratios – every clay is different
- No building regulations for permanent buildings
Material alternatives
Derived from material properties: a substitute must have all relevant properties. Observe the notes on the substitute.
- Tarp
- Plastic sheet / large bin bag (Tears easily; never pull over the head (suffocation risk).), Emergency blanket (Tears easily once punctured; short-term shelter only.), Document folder (waterproof) (Store securely – contains sensitive personal data.), Rain poncho (When used as a shelter, it no longer protects your body from rain.), Bivy bag (Never fully close off the face.), Tent (Do not cook or heat inside the tent (fire and carbon monoxide danger).), Heavy-duty bin bag (large) (Suffocation risk: never pull plastic bags over the head or face and keep them away from small children.), Group shelter bag (Airtight – ventilate regularly.)
Results come exclusively from structured entries. No improvised instructions are generated.
Sources
Gernot Minke – Birkhäuser (2006): Building with Earth: Design and Technology of a Sustainable Architecture
Field tests for clay (rolling and shake test), fibre against shrinkage cracks, weather protection
Dachverband Lehm e.V. – Vieweg+Teubner (2009): Lehmbau Regeln: Begriffe, Baustoffe, Bauteile
Earth building materials and infill panels in modern earth construction
Mors L. Kochanski – Lone Pine Publishing: Bushcraft: Outdoor Skills and Wilderness Survival
Woven rod structures in camp building