









Making an improvised compass from a needle
A steel sewing needle can be magnetised with a small magnet. Floating on a leaf in a cup of water it then turns to point north–south – a simple compass like the ones seafarers used a thousand years ago. Here you learn how to stroke the needle properly, float it, find out which end points north, and why the result is only a rough direction.
- 10–15 minutes
Explained simply
The Earth is a huge, weak magnet. A compass needle is a small magnet that lines up with it.
A sewing needle becomes a small magnet itself if you stroke it many times in the same direction with a magnet.
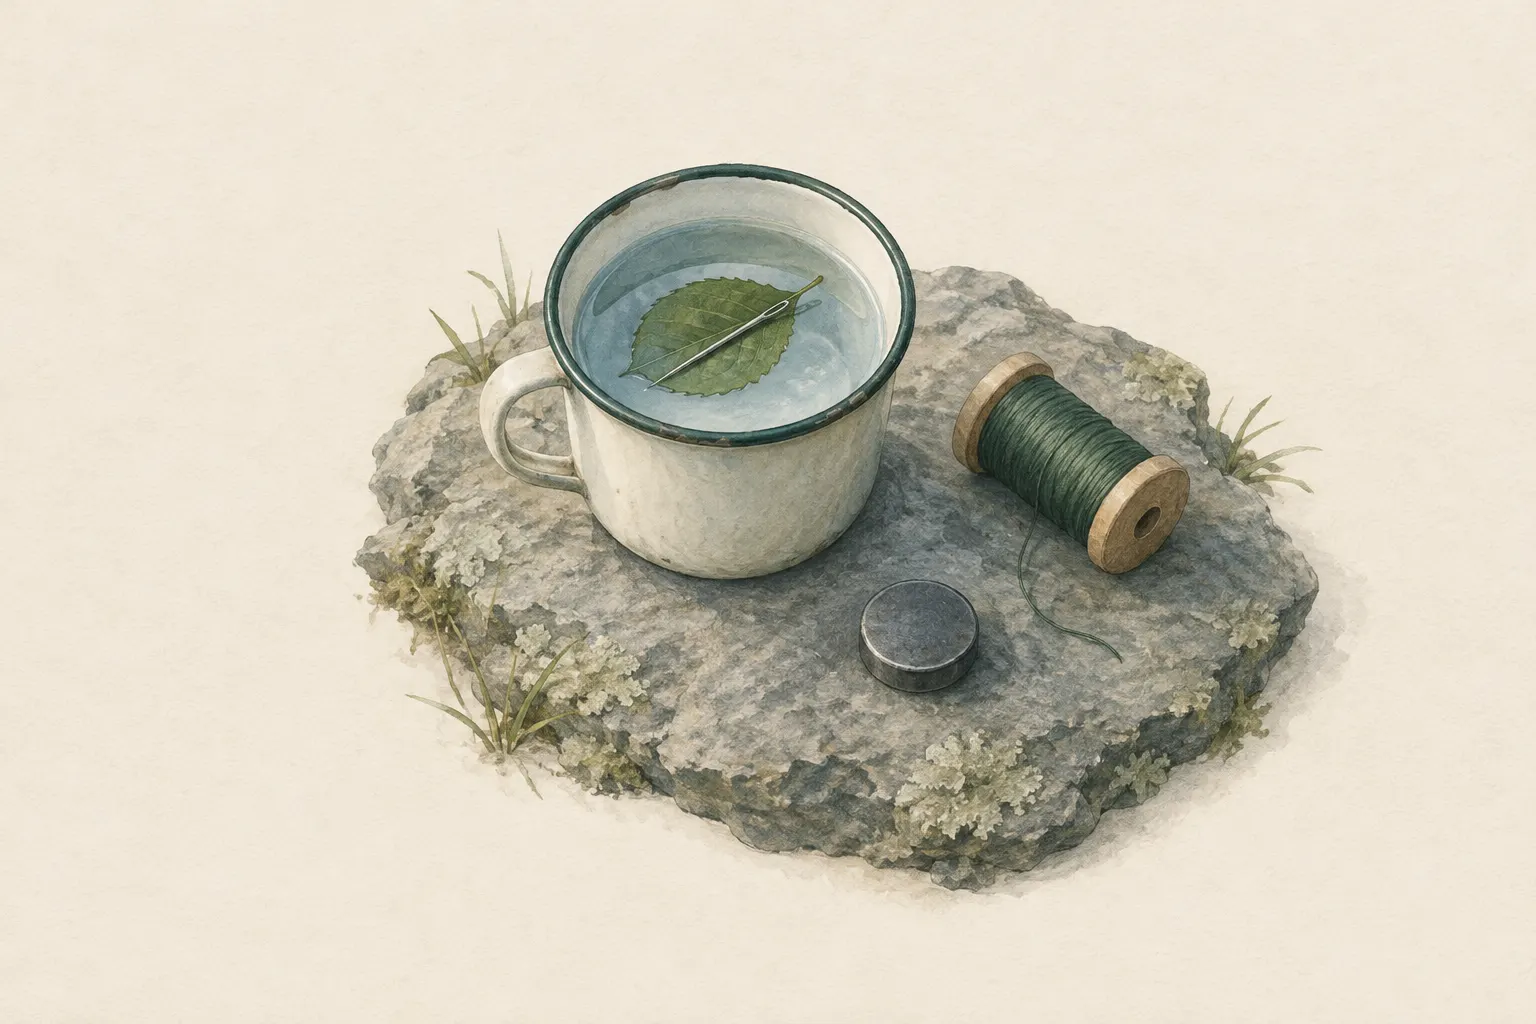
If you lay it on a leaf in water, it turns until it points north and south. You find out which end is north with the sun.
How it works
Steel contains tiny regions that act like little magnets. Normally they point in all directions and cancel each other out. If you always stroke the same way with a magnet, many of them turn in the same direction – the needle becomes magnetic.
On water the needle can turn almost without friction. The Earth's magnetic field pulls one end towards the magnetic north pole and the other towards the south.
What matters
Always stroke in the same direction and lift the magnet well away between strokes.
Still water, a small light leaf, no metal nearby.
Check: turn the leaf away – if the needle comes back, it works.
Safety: what to watch out for
The needle only shows a rough direction. Always check it against the sun or stars.
If you are lost, stay put first and call for help instead of setting off.
No battery-and-wire methods: the wire can get very hot.
Step by step
Magnetise the needle
Stroke one end of the magnet along the needle from the eye to the tip 30 to 50 times – always in the same direction. Lift the magnet well away at the end of each stroke and start again at the eye.
Caution: Do not rub back and forth.
- 1
Magnetise the needle
Stroke one end of the magnet along the needle from the eye to the tip 30 to 50 times – always in the same direction. Lift the magnet well away at the end of each stroke and start again at the eye.
Do not rub back and forth.
- 2
Prepare the float
Lay a small flat leaf, a piece of paper or cork on still water in a cup or puddle. The cup stands firmly on the ground, out of the wind.
- 3
Place the needle
Lay the needle gently in the middle of the leaf. It turns slowly and settles in one direction.
- 4
Test it
Gently turn the leaf away with your finger. If the needle always returns to the same direction, it works. If not: stroke it again.
- 5
Find north
The needle points north–south, but which end is north? Compare with the sun: in the northern hemisphere it is in the south at midday, in the east in the morning, in the west in the evening. The end pointing away from the midday sun is north.
- 6
Mark the direction
Lay a stick on the ground pointing north–south and mark the north end. Re-stroke the needle every few hours – it loses its magnetism.
Common mistakes
- Rubbing back and forth instead of stroking in one direction
- Knife or backpack next to the cup
- Mixing up north and south
- A leaf that is too big and heavy
- Relying on the needle without a cross-check
Quick view
Materials
Steel sewing needle
Or a paper clip, a wire, a steel razor blade
Sharp – handle with care, children only with help.
Small magnet
For example from a magnetic clasp or a fridge magnet
Keep strong magnets away from pacemakers, phones, cards and compasses.
Keep small magnets away from children – swallowing them is very dangerous.
Metal pot (stainless steel, aluminium, titanium)
Or a cup, puddle, plastic bowl – no iron
Hot – scalding risk.
Sewing kit
Thread for hanging
Suitable for
- A rough direction when the compass is missing
- Practice with children
- Confirming sun or star methods
Not suitable for
- Precise bearings with the map
- Near cars, fences, power lines
- A substitute for a real compass on trips
Prerequisites
- Steel needle and a small magnet
- Still water, out of the wind
- Sun or stars to tell north from south
Safety
- Iron, steel, phones and power lines deflect the needle. Put the cup on the ground, away from backpack, knife and car. Always check the result with the sun or stars.
- Methods with a battery and wire (short circuit) are sometimes recommended. The wire can get very hot and damage the battery – we advise against it.
How it works
Steel consists of tiny magnetic regions that normally point every which way. If you always stroke it in the same direction with a magnet, many of them line up and the needle itself becomes a weak magnet. Floating freely it aligns with the Earth's magnetic field like any compass needle – in Central Europe magnetic north is only a few degrees from true north.
Advantages
- Small, light parts
- Works even when it is cloudy
Disadvantages
- Only a rough direction
- Needs a magnet and still water
- North and south must be told apart another way
Deep knowledge
Background
Around a thousand years ago seafarers in China and later in Europe used floating magnetised needles to hold their course under overcast skies. This developed into the compass with a needle in a case.
Many survival handbooks list the needle compass as a stopgap – with the advice to always check the result against the sun or stars.
Variants
- Hang it on a thread
- Tie a thin thread firmly round the middle of the needle so it hangs level. Hung out of the wind, it also turns to north–south.
- Without a magnet
- Some handbooks suggest rubbing the needle on silk or hair. That barely magnetises it and is very unreliable. Better: use a magnetic clasp from a bag or jacket.
Common mistakes
- Rubbing back and forth instead of stroking in one direction
- Knife or backpack next to the cup
- Mixing up north and south
- A leaf that is too big and heavy
- Relying on the needle without a cross-check
Limits and risks
- No accuracy figure possible
- Declination is not taken into account
Material alternatives
Derived from material properties: a substitute must have all relevant properties. Observe the notes on the substitute.
- Metal pot (stainless steel, aluminium, titanium)
- Single-wall stainless steel bottle (Heat only single-wall bottles without paint/plastic; remove the lid before heating.)
Results come exclusively from structured entries. No improvised instructions are generated.
Sources (3)
- Headquarters, Department of the Army (USA) (2002): FM 3-05.70 Survival · Improvised compass from a magnetised needle, floating or hanging
- Harold Gatty – Dover Publications (1999): Finding Your Way Without Map or Compass (first published as 'Nature Is Your Guide', 1958) · Natural and improvised direction finding
- Headquarters, Department of the Army (USA) (2001): FM 3-25.26 Map Reading and Land Navigation · Compass, magnetic field and deflection by metal